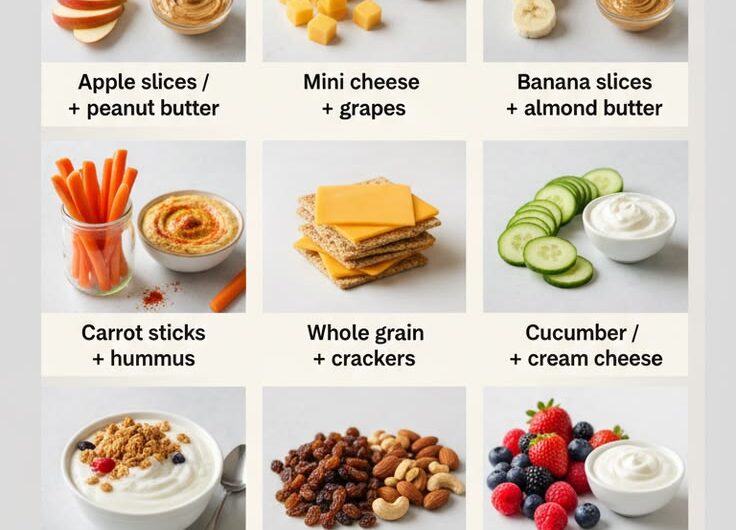
Blog

  • Chicken Recipes

    Chicken Recipes

    Introduction

    Are you looking for something easy that still feels comforting and homemade after a long day? This is one of those chicken recipes you can rely on when you don’t want to think too much but still want a satisfying meal on the table. It’s simple, warm, and works beautifully for family dinners, lazy weekends, or even meal prep for the next day. I often make it when the kitchen feels quiet and I just want something familiar cooking on the stove. The ingredients are everyday basics, but the flavor feels like something special without any extra effort.

    Why You Will Love This Recipe

    Are you tired of meals that take too much time but still don’t feel worth it in the end? This dish solves that problem with minimal effort and maximum comfort. These chicken recipes style meals are loved because they are flexible, budget-friendly, and work with what you already have in your kitchen. The texture stays tender, the sauce is rich but not heavy, and leftovers taste even better the next day. It’s also easy to adjust for small or large families without changing the taste. Whether you’re cooking for two or stretching it for a bigger group, it still feels like a complete homemade meal that fits into real life without stress.

    Ingredients

    Want the best flavor without complicated prep? Use fresh chicken pieces (thighs or boneless breast both work well, but thighs stay juicier).

    • Chicken pieces – 700g (for 4 people)
    • Yogurt – ½ cup
    • Onion (sliced) – 2 medium
    • Garlic paste – 1 tbsp
    • Ginger paste – 1 tbsp
    • Tomato – 2 medium (chopped)
    • Cooking oil – 4 tbsp
    • Salt – 1 tsp (adjust to taste)
    • Red chili powder – 1 tsp
    • Turmeric – ½ tsp
    • Coriander powder – 1 tsp
    • Black pepper – ½ tsp
    • Fresh coriander – for garnish

    For 2 people, simply use half the quantity. For more than 4 people, double everything while keeping spices balanced.

    Instructions

    Step 1: Preparation

    Are you unsure how to start without making a mess in the kitchen? Wash and cut the chicken, chop vegetables, and keep all spices ready. This makes the cooking smooth and prevents overcooking while you search for ingredients later.

    Step 2: Main Cooking Process

    Wondering how to build flavor from the beginning? Heat oil, add onions, and cook until soft and golden. Add garlic and ginger paste, stirring until the aroma comes out. This base creates the depth that defines good home-style cooking.

    Step 3: Combining Ingredients

    Not sure when to add chicken for best taste? Add chicken pieces and stir until they change color. Mix in yogurt, tomatoes, and all spices. Coat everything well so the flavor spreads evenly. For smaller portions, reduce cooking time slightly.

    Step 4: Finishing & Final Simmer

    Are you worried about dryness or overcooking? Cover and simmer on low heat until chicken becomes tender and sauce thickens. Stir gently at the end and adjust seasoning. If cooking for more people, just extend simmer time slightly without increasing flame.

    Why This Recipe Works for Busy Days

    Are busy evenings making it hard to cook something proper? This recipe is perfect because it uses simple steps and one pot cooking. You can prep it in advance and reheat later without losing flavor. It also stretches easily for lunch boxes or next-day meals. These chicken recipes are ideal when you want homemade food without standing in the kitchen for too long.

    Tips & Tricks

    • Are you getting dry chicken sometimes? Always cook on low heat after adding yogurt so the chicken stays soft and juicy. If cooking for fewer people, reduce heat instead of reducing cooking time too much, or it may turn chewy.
    • Do you feel your gravy tastes flat? Let onions turn properly golden before adding spices. This builds real depth. For larger portions, don’t rush this step—flavor depends more on patience than quantity changes.
    • Are spices overpowering your dish? Start with less and adjust later. Every batch of chicken is different in size and water content, so taste before final simmer, especially when scaling up or down.
    • Want better leftovers? Cook slightly thicker gravy so it doesn’t turn watery later. When cooking for 2 instead of 4, reduce simmer time slightly to keep texture balanced.

    Variations

    • Want a richer version with more meat? Add extra chicken pieces or mix in small bone-in cuts for deeper flavor. This works well for larger families, just increase simmer time so everything cooks evenly without changing spice levels.
    • Looking for a vegetarian option? Replace chicken with chickpeas or paneer. Keep the same spices and method. It works well for 2 or 4 servings, just adjust simmer time since vegetables cook faster than meat.
    • Need ingredient flexibility? Swap yogurt with coconut milk for a lighter taste. This keeps the dish smooth and creamy. It’s useful when cooking for fewer people or when you want a slightly different texture.
    • Want stronger aroma and taste? Add fresh curry leaves or a pinch of garam masala at the end. It boosts flavor instantly and works well whether you’re cooking a small batch or a full family portion.

    Serving Suggestions

    • Looking for a simple family dinner plate? Serve this with plain steamed rice or soft roti. It balances the rich gravy and makes a complete meal for 4 people or easily doubles for guests.
    • Want something more filling for lunch? Pair with boiled potatoes or a light salad. This makes the dish stretch further without changing the taste, perfect when serving fewer or more than 4 people.
    • Need a cozy comfort meal idea? Serve with warm naan and a side of yogurt dip. It feels comforting and works great for weekend dinners when everyone sits together.
    • Planning a bigger gathering? Add a rice platter with pickles and fresh salad. This dish scales well, so you can easily increase portions without changing flavor balance.

    Storage Instructions

    • Want to store leftovers safely? Keep the dish in an airtight container in the fridge for up to 3 days. Divide into smaller portions if you cooked a larger batch so it cools evenly and stays fresh.
    • Not sure how to reheat without drying it out? Warm it on low heat with a splash of water. Stir gently so the sauce stays smooth. Smaller portions heat faster, so adjust time accordingly.
    • Thinking about freezing it? Freeze in sealed containers for up to 2 months. For best results, freeze in single or family-size portions depending on how you cooked it, so you only defrost what you need.
    • Want to prepare ahead of time? You can marinate chicken a few hours earlier or even overnight. This saves time later and keeps flavor strong whether you are cooking for 2 or 4 people.

    Recipe Timing

    Are you planning your cooking time in advance?
    Prep Time: 15 minutes
    Cook Time: 35 minutes
    Rest Time: 5 minutes
    Total Time: 55 minutes

    Nutrition Information (Approximate)

    Are you curious about what’s in each serving? Each portion has approximately 320–380 calories, with 28–32g protein depending on chicken cut. It also provides healthy fats and essential minerals from spices and yogurt. These values are estimates and may change based on ingredients used, portion size, and cooking adjustments for smaller or larger servings.

    FAQs

    Can I make it ahead of time?
    Yes, you can cook it a day before and store it in the fridge. The flavor often improves after resting.

    What is the most common mistake?
    Cooking on high heat too quickly can make chicken tough instead of tender.

    Can I replace yogurt?
    Yes, coconut milk or cream can be used, but flavor will be slightly different.

    Why is my gravy too thin?
    Let it simmer uncovered for a few extra minutes to thicken naturally.

    How long does it last in the fridge?
    Up to 3 days in an airtight container if stored properly.

    How can I make it less spicy?
    Reduce chili powder and add a little extra yogurt for balance.

    Conclusion

    Are you looking for a recipe you can come back to again and again without getting bored? This is one of those comforting chicken recipes that fits easily into everyday cooking. You can adjust the spice, change the texture, or scale it up for family gatherings without losing its homemade charm. It’s simple enough for busy days but still satisfying enough for a proper dinner. Once you try it, you’ll see how easily it becomes part of your weekly meal rotation. Cook it your way, enjoy it warm, and make it part of your own kitchen routine.

    Recipe Card

    Chicken Recipes

    Recipe by admin
    Servings

    4

    servings
    Prep time

    15

    minutes
    Cooking time

    35

    minutes
    Calories

    320–380

    kcal

    Are you craving a simple homemade chicken dish that feels comforting and easy at the same time?

    Ingredients

    • Chicken – 700g

    • Yogurt – ½ cup

    • Onion – 2 medium

    • Garlic paste – 1 tbsp

    • Ginger paste – 1 tbsp

    • Tomatoes – 2 medium

    • Oil – 4 tbsp

    • Salt – 1 tsp

    • Red chili powder – 1 tsp

    • Turmeric – ½ tsp

    • Coriander powder – 1 tsp

    • Black pepper – ½ tsp

    • Fresh coriander – garnish

    • (For 2 people, use half ingredients. For more than 4, double all items.)

    Directions

    • Wash and prepare chicken and ingredients.
    • Heat oil, cook onions until golden.
    • Add ginger and garlic, cook until fragrant.
    • Add chicken and stir until color changes.
    • Mix yogurt, tomatoes, and spices.
    • Cover and simmer until chicken is tender.
    • Adjust seasoning and garnish before serving.
  • Crockpot Recipes

    Crockpot Recipes

    Introduction

    Are you tired of thinking every evening about what to cook after a long busy day? This is where crockpot recipes quietly save your time and energy. One of my favorite comfort meals is a simple slow-cooked chicken and vegetable stew that fills the kitchen with a warm, homey smell while you go about your day. It’s the kind of meal you can start in the morning and forget until dinner. I usually prepare it when I know evenings will be hectic, and it always comes out soft, rich, and satisfying without any extra effort.

    Why You Will Love This Recipe

    Are you looking for a meal that feels homemade but doesn’t keep you stuck in the kitchen? This crockpot recipes style chicken stew brings together comfort, simplicity, and real everyday ease. It’s budget-friendly because it uses basic vegetables and simple spices you already have at home. The slow cooking makes the chicken tender and the broth naturally rich without extra work. It also stores well, so leftovers taste even better the next day, which makes it perfect for meal prep. You can easily double it for a family gathering or cut it in half for a smaller meal without losing flavor. It’s the kind of dish you save for later because it fits busy weekdays, lazy weekends, and everything in between.

    Ingredients

    Are you wondering what makes a crockpot stew turn out rich and comforting every time? The secret is using bone-in or good-quality chicken pieces because they stay juicy during slow cooking.

    • Chicken thighs or breast – 600g (for 4 people; use 300g for 2 people, 900g+ for larger servings)
    • Potatoes – 3 medium, chopped
    • Carrots – 3 medium, sliced
    • Onion – 1 large, chopped
    • Garlic – 3 cloves, minced
    • Chicken broth – 3 cups
    • Tomato paste – 2 tablespoons
    • Olive oil – 1 tablespoon (optional)
    • Salt – 1 teaspoon (adjust to taste)
    • Black pepper – ½ teaspoon
    • Dried thyme – 1 teaspoon

    Instructions

    Step 1: Preparation (40 words)

    Are you unsure how much effort prep really takes for crockpot recipes like this? Start by washing and chopping all vegetables into even pieces so they cook evenly. Trim and cut chicken into medium chunks. If cooking for 2, simply reduce everything in half.

    Step 2: Main Cooking Process

    Are you worried about overcooking or undercooking in a slow cooker? Place chicken at the bottom of the crockpot, then layer potatoes, carrots, onion, and garlic on top. This helps flavors build slowly. For larger servings, keep layers even for proper cooking.

    Step 3: Combining Ingredients

    Are you wondering when the stew actually starts coming together? Pour in chicken broth, add tomato paste, salt, pepper, and thyme. Stir gently so everything mixes slightly. For smaller portions, reduce liquid but keep seasoning balanced so flavor stays rich and steady.

    Step 4: Finishing & Final Simmer

    Are you unsure how long to leave it cooking? Cover and cook on low for 6–7 hours or high for 3–4 hours until chicken is tender. Stir once at the end. Adjust thickness by adding broth if needed for bigger batches.

    Why This Recipe Works for Busy Days

    Are you trying to find meals that don’t need constant attention? This dish fits perfectly into busy routines because it cooks slowly while you focus on work or family. It also makes enough for leftovers, which means less cooking later in the week. Many crockpot recipes like this one are ideal for meal prep, giving you a ready-to-eat, comforting dish without standing over the stove every evening.

    Tips & Tricks

    Are you wondering how to make your slow cooker meals taste even better?

    • Let the chicken sit at room temperature for 10–15 minutes before cooking so it cooks evenly. Avoid adding frozen meat directly, as it can water down flavor. If cooking for fewer people, reduce liquid slightly to keep taste concentrated and rich.
    • Cut vegetables in similar sizes so everything softens at the same time. A common mistake is uneven chopping, which leads to mushy or hard pieces. For larger servings, keep layering even instead of overfilling the pot.
    • Always taste at the end, not the beginning. Slow cooking changes seasoning strength, so adjust salt and pepper only after cooking. If cooking for 2, seasoning should also be slightly reduced.
    • If you want thicker stew, mash a few potatoes inside the pot before serving. This naturally thickens broth without extra ingredients. For bigger portions, increase simmer time slightly instead of adding flour or starch.

    Variations

    Are you looking to change things up without changing the comfort of the dish?

    • Meaty Version: Add beef chunks instead of chicken for a deeper, richer flavor. Cook time will increase slightly, but the result is thicker and more hearty. Great for family dinners where you want a stronger taste and larger serving flexibility.
    • Vegetarian Option: Replace chicken with chickpeas and mushrooms. This keeps the stew filling and protein-rich. Cooking time stays almost the same, and it still works perfectly for both small and large servings without changing the base method.
    • Ingredient Swap: Try sweet potatoes instead of regular potatoes for a slightly sweeter flavor. You can also add zucchini for extra softness. Works well for both 2-person and 6-person servings without changing cooking time.
    • Flavor Boost: Add paprika or rosemary for a deeper aroma. A small squeeze of lemon at the end brightens everything. Adjust herbs slightly when cooking for fewer people so flavors don’t become too strong.

    Serving Suggestions

    Are you wondering how to turn this into a complete cozy meal?

    • Rustic Bread Side: Serve with warm bread to soak up the broth. It turns the dish into a filling dinner. For small servings, one loaf is enough, while larger groups may need extra baskets for sharing.
    • Rice Bowl Style: Spoon the stew over plain rice for a comforting bowl meal. This works well for families, and rice quantity can easily be adjusted depending on how many people you are serving.
    • Light Salad Pairing: A fresh cucumber or green salad balances the warm stew. Ideal for healthier meals and works for both 2-person dinners and larger gatherings.
    • Cozy Dinner Setup: Serve in deep bowls with a sprinkle of herbs on top. This simple presentation makes it feel special without extra effort, especially when cooking for guests.

    Storage Instructions

    Are you worried about storing leftovers safely after cooking?

    • Fridge Storage: Keep leftovers in an airtight container for up to 3–4 days. Divide into smaller portions if you plan to reheat single servings. Larger batches should be cooled fully before storing to maintain freshness and texture.
    • Reheating: Warm on the stove or microwave until steaming hot. Add a splash of broth if it feels thick. Small portions heat faster, while larger portions may need gentle stirring during reheating.
    • Freezing: Freeze in sealed containers for up to 2 months. Divide into meal-sized portions for easy use. Thaw overnight in the fridge before reheating for best texture and flavor.
    • Make-Ahead Tips: Chop vegetables and store them a day before cooking. You can also prepare seasoning mix in advance. This helps especially when cooking for larger groups or busy weekdays.

    Recipe Timing

    Prep Time: 15 minutes
    Cook Time: 6–7 hours (low) or 3–4 hours (high)
    Rest Time: 10 minutes
    Total Time: About 6–7 hours 25 minutes (slow cook method)

    Nutrition Information (Approximate)

    Are you curious about what this meal provides nutritionally? One serving contains approximately 280–350 calories, 22–28g protein, and a good amount of fiber from vegetables. It also includes potassium and vitamin A from carrots and potatoes. These values are estimates and may change depending on ingredient choices, portion sizes, and cooking adjustments.

    FAQs

    Can I prepare this ahead of time?
    Yes, you can chop everything the night before and store it in the fridge. It makes morning cooking faster and easier.

    What is the most common mistake?
    Adding too much liquid is the main mistake. It can make the stew watery instead of rich and thick.

    Can I replace chicken with something else?
    Yes, chickpeas or beef work well. Just adjust cooking time slightly depending on the ingredient.

    Why is my stew too thin?
    It may need more cooking time or slightly less broth. Mashing potatoes can also help thicken it naturally.

    How long can I store leftovers?
    In the fridge, it lasts 3–4 days. In the freezer, it can last up to 2 months safely.

    How can I adjust the flavor?
    Add herbs like rosemary or thyme at the end for stronger aroma, or a little lemon juice for freshness.

    Conclusion

    Are you looking for meals that feel comforting without taking up your whole day? This is exactly where crockpot recipes become a part of your weekly routine. This chicken and vegetable stew is simple, flexible, and easy to adjust whether you are cooking for one, two, or a full family table. You can change ingredients, adjust portions, and still get the same cozy result every time. It’s the kind of dish you come back to again and again because it quietly fits into real life without stress. Save it for later and make it your go-to slow cooker meal whenever you need something warm and effortless.

    Recipe Card

    Crockpot Recipes

    Recipe by admin
    Servings

    4

    servings
    Prep time

    15

    minutes
    Cooking time

    6

    minutes
    Calories

    280–350

    kcal

    A warm, slow-cooked chicken and vegetable stew made for busy days. Simple ingredients, soft textures, and deep flavor make it a cozy family meal that cooks itself while you relax.

    Ingredients

    • 600g chicken thighs or breast (300g for 2, 900g+ for larger groups)

    • 3 medium potatoes, chopped

    • 3 carrots, sliced

    • 1 large onion, chopped

    • 3 garlic cloves, minced

    • 3 cups chicken broth

    • 2 tbsp tomato paste

    • 1 tbsp olive oil (optional)

    • 1 tsp salt (adjust as needed)

    • ½ tsp black pepper

    • 1 tsp dried thyme

    Directions

    • Chop vegetables and chicken evenly. Reduce all ingredients in half if cooking for 2 people.
    • Add chicken to crockpot base, then layer vegetables on top for even cooking.
    • Pour broth, tomato paste, and seasonings. Stir lightly to combine flavors.
    • Cook on low 6–7 hours or high 3–4 hours until chicken is tender. Adjust liquid if needed.

  • Summertime Drinks

    Summertime Drinks

    Introduction

    Feeling overheated and craving something simple to cool down? Summertime drinks are the kind of easy, refreshing recipes that bring instant comfort on warm days without much effort. They’re light, colorful, and perfect for everything from lazy afternoons to family get-togethers. I often mix these up when the day feels too long and hot, and they never disappoint. What makes them special is how flexible they are—you can use what you have at home and still create something fresh, fruity, and satisfying. Whether you’re relaxing alone or serving guests, these drinks fit right in.

    Why You Will Love This Recipe

    Looking for a quick way to stay refreshed without turning on the stove? These summertime drinks are incredibly easy to prepare and don’t require complicated steps or expensive ingredients. They’re budget-friendly, naturally sweet, and perfect for sharing with family or friends. You can make them ahead, chill them, and enjoy later without losing flavor.

    Do you want something that works for both kids and adults? These drinks are flexible enough to adjust sweetness, fruit, or even add herbs for a twist. They’re cozy in a summer way—cool, calming, and satisfying. Plus, they’re great for busy days when you just need something simple and refreshing ready in minutes.

    Ingredients

    Choosing ripe fruits makes a big difference in flavor and natural sweetness.

    • 2 cups fresh watermelon cubes
    • 1 cup fresh orange juice
    • 1 tablespoon lemon juice
    • 2 tablespoons sugar (adjust to taste)
    • 2 cups cold water
    • 1 cup ice cubes
    • Fresh mint leaves (optional)

    For 2 people, simply halve the ingredients. For more than 4 people, double or triple everything while keeping the taste balanced.

    Instructions

    Step 1: Preparation –
    Want your drink to taste naturally sweet and fresh? Start by cutting watermelon into small cubes and removing seeds if needed. Squeeze fresh oranges and lemon juice. Keep everything chilled beforehand for a cooler drink without needing too much ice later.

    Step 2: Main Cooking Process –
    Wondering how to get that smooth texture? Add watermelon cubes, orange juice, lemon juice, sugar, and water into a blender. Blend until smooth and slightly frothy. If making for 2 people, use a smaller blender jar for better consistency.

    Step 3: Combining Ingredients –
    Not sure how to balance flavor and texture? Taste the drink after blending and adjust sugar or lemon as needed. Strain if you prefer a smoother finish. For larger servings, mix in a big jug and stir well before serving.

    Step 4: Finishing & Final Simmer –
    Want that refreshing final touch? Pour the drink into glasses filled with ice cubes. Add fresh mint leaves on top for aroma. Let it sit for a minute so flavors blend nicely before serving cold for the best experience.

    Why This Recipe Works for Busy Days

    Need something quick that doesn’t take much effort? This recipe comes together in minutes and can be stored in the fridge for later. You can prepare it in advance and serve anytime. It’s perfect for busy afternoons when you want something refreshing without spending time in the kitchen.

    Tips & Tricks

    • Want a naturally sweeter drink without extra sugar? Use fully ripe watermelon and oranges, as they bring natural sweetness. Avoid underripe fruits, as they can taste bland. If making for 2 people, sweetness becomes more noticeable, so adjust carefully.
    • Struggling with a watery texture? Reduce the amount of added water slightly and rely more on fruit juice. When making a larger batch, keep balance by tasting before serving and adjusting gradually instead of adding everything at once.
    • Want a colder drink without diluting flavor? Chill all ingredients before blending instead of adding too much ice. For smaller servings, fewer ice cubes work better, while larger batches can handle more ice without losing taste.
    • Not sure how to keep flavors fresh longer? Store the drink in an airtight jug and stir before serving. When scaling up, avoid leaving it at room temperature for too long, as fresh fruit drinks taste best when cold and freshly mixed.

    Variations

    Meaty Version
    Looking to make it more filling? Pair this drink with small chilled fruit and yogurt bites on the side. While the drink stays light, adding protein-based snacks makes it more satisfying. For smaller servings, keep portions light, and for larger groups, increase both drink and snack portions together.

    Vegetarian Option
    Want a fully plant-based refreshing option? This drink is naturally vegetarian, but you can enhance it by adding coconut water instead of plain water. It adds a mild sweetness and tropical flavor. Adjust quantities easily depending on how many people you are serving.

    Ingredient Swap
    Missing watermelon at home? Replace it with strawberries or mango for a different flavor. Each fruit gives a new twist while keeping the drink refreshing. For 2 servings, test flavor first, while for larger batches, mix fruits for a layered taste.

    Flavor Boost
    Want to make it more exciting? Add a pinch of black salt or a few basil leaves for a unique flavor. These small additions change the entire taste without extra effort. When scaling up, add these slowly to avoid overpowering the drink.

    Serving Suggestions

    • Chilled Glasses
      Want that café-style feel at home? Serve the drink in chilled glasses with ice cubes and mint on top. For smaller servings, use shorter glasses, while for larger groups, serve in a jug so everyone can pour easily.
    • With Light Snacks
      Thinking about a quick snack combo? Pair this drink with light sandwiches or fruit chaat. It balances flavors well and makes a simple meal. Adjust portions depending on how many people you’re serving.
    • Family Gatherings
      Planning for guests at home? Serve this drink in a large jug with sliced fruits inside for presentation. For bigger groups, double or triple the recipe and keep extra chilled in the fridge.
    • Evening Relaxation
      Want something calming after a long day? Enjoy this drink with a light dinner or on its own. For 2 people, keep it simple and fresh, while for more people, prepare ahead to save time.

    Storage Instructions

    • Fridge Storage
      Wondering how long it stays fresh? Store the drink in a covered jug in the fridge for up to 24 hours. Stir before serving. Smaller portions are easier to keep fresh, while larger batches should be consumed sooner for best taste.
    • Reheating
      Concerned about serving again later? This drink doesn’t need reheating. Simply give it a good stir and add fresh ice before serving. For small servings, shake in a bottle; for larger amounts, stir in a jug.
    • Freezing
      Thinking of saving extra? Freeze the drink in ice cube trays and blend again when needed. This works well for both small and large portions, keeping flavor fresh without waste.
    • Make-Ahead Tips
      Want to prep in advance? Blend the drink and store it chilled without ice. Add ice just before serving to maintain taste. For bigger servings, prepare in batches instead of one large mix.

    Recipe Timing

    Prep Time: 10 minutes
    Cook Time: 0 minutes
    Rest Time: 2 minutes
    Total Time: 12 minutes

    Nutrition Information (Approximate)

    Calories: 80–120 per serving
    Protein: 1–2g
    Rich in vitamin C and hydration from fresh fruits. These values are estimates and may vary depending on ingredients and portion sizes.

    FAQs

    Can I make this drink ahead of time?
    Yes, you can prepare it a few hours earlier and store in the fridge. Stir before serving.

    Why does my drink taste bland?
    It may be due to unripe fruit. Use ripe watermelon and adjust sugar slightly.

    Can I skip sugar?
    Yes, if fruits are sweet enough. For smaller servings, taste first before adding.

    Why is my drink too thick?
    Add a little water and mix again until desired consistency is reached.

    How long can I store it?
    Up to 24 hours in the fridge, but best enjoyed fresh.

    How can I make it more tangy?
    Add extra lemon juice gradually and taste as you go.

    Conclusion

    Looking for an easy way to stay cool and refreshed during hot days? These summertime drinks are simple, flexible, and perfect for everyday use. You can adjust flavors, swap fruits, and make them your own without much effort. They’re great for both quiet moments and sharing with family. Once you try it, you’ll likely come back to it again and again. Keep it chilled, keep it fresh, and enjoy every sip.

    Recipe Card

    Summertime Drinks

    Recipe by admin
    Servings

    4

    servings
    Prep time

    4

    minutes
    Cooking timeminutes
    Calories

    80–120

    kcal

    A light and refreshing fruit drink made with simple ingredients. Perfect for hot days, easy to prepare, and great for sharing with family or friends.

    Ingredients

    • 2 cups watermelon cubes

    • 1 cup orange juice

    • 1 tablespoon lemon juice

    • 2 tablespoons sugar

    • 2 cups cold water

    • 1 cup ice cubes

    • Mint leaves (optional)

      (For 2 people, use half ingredients. For more than 4, double or increase as needed.)

    Directions

    • Cut watermelon into cubes and remove seeds.
    • Add watermelon, orange juice, lemon juice, sugar, and water into a blender.
    • Blend until smooth and slightly frothy.
    • Taste and adjust sweetness if needed.
    • Pour into glasses with ice and add mint leaves.
    • Serve cold and enjoy.

  • Lake Day Snacks

    Lake Day Snacks

    Introduction

    Wondering what to pack when you want something easy but still homemade for a relaxing day outdoors? Lake day snacks are all about simple, tasty bites that travel well and keep everyone happy between swims and sunshine. I often lean on this mix of crunchy wraps, juicy fruit, and a creamy dip because it’s quick to pull together and feels just right for sharing. These snacks don’t need reheating, don’t make a mess, and hold up beautifully in a cooler. Whether it’s a slow afternoon by the water or a busy family outing, this setup keeps things stress-free and satisfying.

    Why You Will Love This Recipe

    Looking for snacks that won’t stress you out before heading out the door? This lake day snacks spread is easy, flexible, and made with everyday ingredients you probably already have. It’s cozy in the sense that it feels homemade, yet light enough for warm weather. You can prep everything ahead, pack it neatly, and enjoy it later without fuss. It’s also budget-friendly and works well for picky eaters since everyone can grab what they like. Leftovers hold up nicely, and you can switch things based on what’s in your fridge. It’s the kind of meal you’ll want to save and reuse all summer long.

    Ingredients

    Wondering which bread works best for wraps? Soft tortillas or flatbreads hold fillings well and stay fresh longer.

    • 4 large tortillas or flatbreads
    • 2 cups cooked shredded chicken
    • 1 cup cream cheese, softened
    • 1/2 cup mayonnaise
    • 1 cup chopped lettuce
    • 1/2 cup sliced cucumbers
    • 1/2 cup shredded carrots
    • 1/2 teaspoon salt
    • 1/2 teaspoon black pepper
    • 1 teaspoon garlic powder
    • 2 cups mixed fresh fruit (grapes, apple slices, berries)
    • 1 cup crackers

    For 2 people: simply halve all ingredients. For more than 4, double or adjust based on how many wraps each person may eat.

    Instructions

    Step 1: Preparation – 40 words
    Feeling rushed before heading out? Start by washing and cutting all vegetables and fruit into bite-sized pieces. Shred the chicken if not already done. Lay out tortillas and let cream cheese soften so everything spreads easily without tearing the wraps.

    Step 2: Main Cooking Process – 40 words
    Not sure how to get the filling just right? In a bowl, mix cream cheese, mayonnaise, garlic powder, salt, and pepper until smooth. Add shredded chicken and stir until coated. The mixture should look creamy but not too thick.

    Step 3: Combining Ingredients – 40 words
    Worried about wraps falling apart? Spread the chicken mixture evenly over each tortilla, then layer lettuce, cucumbers, and carrots. Roll tightly into wraps and slice into halves. For smaller servings, make thinner wraps; for larger groups, prepare extra tortillas.

    Step 4: Finishing & Final Simmer – 40 words
    Thinking about packing and serving? Place wraps in a container, add fruit and crackers on the side, and chill briefly if possible. Keep in a cooler bag for freshness. If making for more people, pack in batches to keep everything neat and fresh.

    Why This Recipe Works for Busy Days

    Need something you can prep ahead without last-minute stress? These snacks come together quickly and can be made hours before you leave. They store well, travel easily, and don’t require reheating. Perfect for planning ahead and enjoying later without extra effort.

    Tips & Tricks

    • Wondering how to keep wraps from getting soggy? Always pat vegetables dry before adding them. Too much moisture can make the wraps soft. If making for 2 people, use less filling per wrap; for larger groups, keep fillings separate until assembly.
    • Struggling with bland flavor? Add a squeeze of lemon juice or a pinch more seasoning to the filling. Taste before spreading. When scaling up, mix seasoning in small batches so flavors stay balanced instead of becoming too salty.
    • Finding your wraps tearing easily? Let them sit at room temperature for a few minutes before using. Cold tortillas crack faster. For fewer servings, handle gently; for more, stack and cover with a cloth to keep them soft.
    • Worried about packing neatly? Use parchment paper to wrap each roll before placing in a container. This keeps them fresh and easy to grab. When making extra portions, layer carefully to avoid squishing the wraps underneath.

    Variations

    Meaty Version
    Want something more filling? Swap shredded chicken with sliced grilled beef or turkey. The texture becomes heartier and more satisfying for bigger appetites. If cooking for 2, use smaller portions of meat; for larger groups, prepare extra protein to keep everyone full.

    Vegetarian Option
    Trying to skip meat? Replace chicken with mashed chickpeas or a mix of beans. Add a little extra seasoning for depth. This version is budget-friendly and still very filling. Adjust quantities easily by scaling the beans up or down.

    Ingredient Swap
    Missing a few ingredients? Use yogurt instead of mayonnaise for a lighter feel, or swap cucumbers with bell peppers for crunch. These small changes keep the recipe flexible. For smaller servings, adjust swaps in small amounts to maintain balance.

    Flavor Boost
    Craving a little more punch? Add fresh herbs like parsley or a sprinkle of chili flakes. A bit of spice or freshness can completely change the taste. When making for a crowd, offer different flavor options so everyone finds something they like.

    Serving Suggestions

    • Picnic Style Box
      Want a neat way to serve everything? Pack wraps, fruit, and crackers into small boxes or containers. It keeps portions controlled and easy to grab. For 2 people, use compact boxes; for larger groups, prepare multiple sets for easy sharing.
    • Family Platter
      Hosting a casual gathering? Arrange sliced wraps on a large tray with fruit scattered around. It looks inviting and makes sharing simple. Adjust the number of wraps depending on how many people you’re serving.
    • Snack Boards
      Looking for a fun presentation idea? Create a snack board with wraps, dips, crackers, and fruit. It’s visually appealing and perfect for relaxed outdoor meals. Scale ingredients up or down depending on group size.
    • Grab-and-Go Packs
      Need something quick for kids or busy outings? Wrap individual portions in paper for easy carrying. This works great for small servings and can be doubled or tripled for bigger families without extra effort.

    Storage Instructions

    • Fridge Storage
      Worried about leftovers? Store wraps in an airtight container in the fridge for up to 2 days. Keep fruit separate to avoid moisture. For smaller portions, use smaller containers; for larger batches, divide into sections to maintain freshness.
    • Reheating
      Thinking about reheating? These snacks are best enjoyed cold or at room temperature. If needed, let them sit out for a few minutes before eating. Avoid microwaving, as it can make the wraps soggy, especially in larger quantities.
    • Freezing
      Considering freezing? It’s not ideal due to fresh vegetables and creamy filling. If you must, freeze only the chicken mixture. Thaw and assemble fresh wraps later. This works better when prepping for different portion sizes ahead of time.
    • Make-Ahead Tips
      Planning ahead for a trip? Prepare the filling a day before and store it separately. Assemble wraps just before leaving for best texture. For 2 people, make a small batch; for larger groups, prep ingredients in stages to save time.

    Recipe Timing

    Prep Time: 15 minutes
    Cook Time: 10 minutes
    Rest Time: 10 minutes
    Total Time: 35 minutes

    Nutrition Information (Approximate)

    Wondering about nutrition? Each serving (for 4 people total) has around 350–450 calories, with 18–22g protein. It also provides fiber from vegetables and vitamins from fresh fruit. Values are estimates and may vary depending on ingredients and portion sizes.

    FAQs

    Can I make this ahead of time?
    Yes, prepare filling a day before and assemble closer to serving time for best texture.

    Why are my wraps soggy?
    Too much moisture from vegetables—pat them dry before using.

    Can I substitute chicken?
    Yes, use beans, tofu, or another protein you prefer.

    What if the filling feels too thick?
    Add a small spoon of yogurt or mayo to loosen it.

    How long do leftovers last?
    Up to 2 days in the fridge if stored properly.

    Can I adjust flavors easily?
    Yes, add herbs, spices, or थोड़ा spice to taste.

    Conclusion

    Looking for something simple yet satisfying for outdoor days? These lake day snacks bring together ease, comfort, and fresh flavor in one easy setup. You can mix and match ingredients, adjust portions, and make it your own every time. It’s the kind of recipe you’ll come back to whenever you need something quick and reliable. Whether it’s a quiet day by the water or a lively family outing, this snack idea fits right in. Pack it once, and you’ll see how effortlessly it becomes a favorite.

    Recipe Card

    Lake Day Snacks

    Recipe by admin
    Servings

    4

    servings
    Prep time

    15

    minutes
    Cooking time

    10

    minutes
    Calories

    350–450

    kcal

    A simple mix of wraps, fresh fruit, and crunchy sides perfect for outdoor days. Easy to prepare, pack, and enjoy anytime.

    Ingredients

    • 4 large tortillas

    • 2 cups shredded chicken

    • 1 cup cream cheese

    • 1/2 cup mayonnaise

    • 1 cup lettuce

    • 1/2 cup cucumbers

    • 1/2 cup carrots

    • 1/2 tsp salt

    • 1/2 tsp black pepper

    • 1 tsp garlic powder

    • 2 cups mixed fruit

    • 1 cup crackers

      For 2 people: use half ingredients. For more than 4: double or adjust as needed.

    Directions

    • Wash and cut vegetables and fruit. Shred chicken and soften cream cheese.
    • Mix cream cheese, mayonnaise, and spices. Add chicken and mix well.
    • Mix cream cheese, mayonnaise, and spices. Add chicken and mix well.
    • Pack with fruit and crackers. Chill or store in a cool bag until ready to eat.

      This easy recipe keeps things simple, tasty, and perfect for sharing outdoors.


  • Sun Tea

    Sun Tea

    Introduction

    Ever wish for a drink that feels refreshing without much effort? Sun tea is a simple, old-school way of brewing tea using sunlight instead of boiling water. It’s loved for its smooth, mellow flavor and the calm feeling it brings on warm days. I often set a jar outside in the morning and let nature do the work. It’s perfect for slow afternoons, family picnics, or even a quiet break after a busy day. With just a few ingredients and patience, you get a naturally brewed drink that tastes clean and light without any fuss.

    Why You Will Love This Recipe

    Looking for something easy that still feels special? This sun tea recipe fits right into busy routines while giving you a cozy, homemade touch. The flavor comes out softer and less bitter than stovetop tea, which makes it great for all ages. It’s budget-friendly, requires no fancy tools, and can be made ahead for the next day. You can adjust sweetness, add fruits, or keep it plain—whatever suits your mood. It’s also a lovely drink to share, whether you’re hosting friends or just relaxing at home. Once you try it, it becomes a go-to habit.

    Ingredients

    Choosing good tea bags makes a big difference—go for simple black or green tea for best flavor.

    • 4 tea bags (black or green)
    • 4 cups clean drinking water
    • 2–3 tablespoons sugar (optional)
    • 2–3 lemon slices (optional)
    • Fresh mint leaves (optional)

    For 2 people: use 2 tea bags and 2 cups water.
    For more than 4 people: double or triple ingredients as needed.

    Instructions

    Step 1: Preparation –
    Need something easy to start with? Fill a clean glass jar with 4 cups of water and gently place the tea bags inside. Cover the jar with a lid or plate to keep dust away while it sits outside.

    Step 2: Main Cooking Process –
    Wondering how long it takes? Place the jar in direct sunlight for about 3 to 4 hours. As the sun warms the water, the tea slowly brews and changes color to a light amber shade.

    Step 3: Combining Ingredients –
    Thinking about adding flavor? Once brewed, remove the tea bags and stir in sugar if you like it sweet. Add lemon slices or mint leaves for a fresh taste. Stir gently so everything blends evenly.

    Step 4: Finishing & Final Simmer –
    Want it ready to drink? Place the jar in the fridge for at least 1 hour to chill. For 2 servings, chilling is faster. For larger batches, allow extra time so the tea cools properly before serving.

    Why This Recipe Works for Busy Days

    Need something you can prepare without standing in the kitchen? Sun tea works quietly while you go about your day. There’s no stove, no constant checking, and it stores well for later. You can make a batch in the morning and enjoy it chilled in the evening, making it perfect for simple meal prep.

    Tips & Tricks

    • Worried about weak flavor? Use fresh tea bags and make sure the jar gets full sunlight. If making for 2 people, don’t reduce brewing time too much. For larger batches, add an extra tea bag instead of overbrewing to avoid bitterness.
    • Not sure about sweetness? Always add sugar after brewing, not before. This helps you control taste better. For smaller servings, add a little at a time. For bigger batches, stir well so sweetness spreads evenly without settling at the bottom.
    • Concerned about cleanliness? Always use a clean, covered jar to avoid dust or bacteria. For larger quantities, use multiple jars instead of one big container. Smaller portions stay fresher and are easier to handle safely.
    • Want stronger tea? Let it sit slightly longer, but don’t go beyond 4 hours in strong sun. For 2 servings, you can shorten the time slightly. For more people, increase tea bags instead of extending sun time too much.

    Variations

    Meaty Version
    Craving something different? While sun tea is usually light, you can serve it alongside grilled meats for a balanced meal. The smooth tea helps cut through rich flavors. For smaller servings, keep tea simple. For larger gatherings, add citrus for a refreshing contrast.

    Vegetarian Option
    Looking for a plant-based drink? This recipe is naturally vegetarian and vegan-friendly. You can enhance it with fresh herbs or fruits like berries. For 2 servings, use fewer add-ins. For bigger groups, mix different flavors to create variety in one batch.

    Ingredient Swap
    Don’t have black tea? Try green tea or herbal blends like chamomile. Each gives a unique taste. For small servings, test one flavor first. For larger amounts, mix two types of tea for a more layered flavor that still feels smooth.

    Flavor Boost
    Want something more exciting? Add slices of orange, cucumber, or a pinch of ginger. These small touches make a big difference. For fewer servings, keep flavors simple. For more people, create a fruit mix to make it feel special and refreshing.

    Serving Suggestions

    • Chilled Afternoon Drink
      Need something refreshing after a long day? Serve sun tea over ice with lemon slices. It feels light and cooling. For 2 people, pour fresh servings. For larger groups, keep a big jug ready so everyone can refill easily.
    • With Light Snacks
      Planning a casual snack time? Pair this tea with biscuits or fruit slices. The mild taste balances sweet or salty bites. For smaller servings, keep portions simple. For gatherings, offer a mix of snacks to match different tastes.
    • Family Meal Companion
      Want a simple drink for dinner? Serve it alongside rice or grilled dishes. It adds a refreshing touch without overpowering food. For 2 people, a small jug works fine. For bigger meals, double the batch to avoid running out.
    • Picnic Style Serving
      Thinking about outdoor fun? Pack sun tea in bottles with ice. It’s easy to carry and share. For small groups, use personal bottles. For larger picnics, bring a cooler with extra tea to keep it chilled longer.

    Storage Instructions

    • Fridge Storage
      Worried about freshness? Store sun tea in the refrigerator in a covered container for up to 2 days. For smaller portions, use small bottles to keep flavor fresh. Larger batches should be stored in airtight jars to maintain taste and safety.
    • Reheating
      Thinking of warming it? Sun tea is best served cold, but you can gently warm it if needed. For small servings, heat only what you need. For larger quantities, avoid reheating the whole batch to keep flavor intact.
    • Freezing
      Want to save it longer? Freeze sun tea in ice cube trays. This works great for adding to future drinks. For small batches, freeze a few cubes. For larger ones, store multiple trays for easy use later.
    • Make-Ahead Tips
      Planning ahead? Prepare sun tea a day before and keep it chilled. For 2 people, make a smaller fresh batch. For more servings, prepare in parts to keep flavor fresh and avoid storing too long.

    Recipe Timing

    Prep Time: 5 minutes
    Cook Time: 3–4 hours (sun brewing)
    Rest Time: 1 hour (chilling)
    Total Time: About 4–5 hours

    Nutrition Information (Approximate)

    Curious about what’s inside your drink? Each serving has about 20–50 calories depending on sugar added. Protein is nearly zero. It may provide small amounts of antioxidants from tea. Values are estimates and can vary based on ingredients and portion size.

    FAQs

    Can I make sun tea ahead of time?
    Yes, you can make it a day before and store it in the fridge. For smaller portions, make fresh for best taste.

    Why does my tea taste weak?
    You may need more tea bags or stronger sunlight. Adjust based on batch size.

    Can I use herbal tea?
    Yes, herbal tea works well and gives different flavors. Adjust quantity for stronger taste.

    Why is my tea cloudy?
    It may be overbrewed or cooled too slowly. Chill quickly after brewing.

    How long can I store it?
    Up to 2 days in the fridge. Smaller batches stay fresher longer.

    How can I adjust the flavor?
    Add lemon, mint, or fruit slices. Adjust based on serving size for balance.

    Conclusion

    Looking for a simple way to enjoy a refreshing homemade drink? Sun tea is one of those quiet recipes that fits into everyday life without effort. It’s easy to adjust, fun to customize, and perfect for sharing with family or enjoying alone. Once you get used to making it, you’ll find yourself coming back to it again and again, especially on warm days. Keep it simple or dress it up with flavors—the choice is yours. Either way, this gentle brewing method brings a calm, homemade touch to your routine.

    Recipe Card

    Sun Tea

    Recipe by admin
    Servings

    4

    servings
    Prep time

    5

    minutes
    Cooking time

    3

    minutes
    Calories

    20–50

    kcal

    A simple and refreshing tea made using sunlight. Smooth, light, and perfect for warm days. Easy to prepare and great for sharing with family.

    Ingredients

    • 4 tea bags

    • 4 cups water

    • 2–3 tablespoons sugar (optional)

    • 2–3 lemon slices (optional)

    • Mint leaves (optional)
      For 2 people: use half ingredients
      For more than 4 people: double or increase as needed

    Directions

    • Fill a clean glass jar with water and add tea bags. Cover it.
    • Place the jar in direct sunlight for 3–4 hours until color changes.
    • Remove tea bags and add sugar, lemon, or mint if desired. Stir gently.
    • Chill in the fridge for at least 1 hour before serving.

      Enjoy chilled for best taste.


  • 90s CooKout

    90s CooKout

    Introduction

    Ever wish you could bring back those simple backyard meals that felt easy and fun? A 90s cookout is all about juicy grilled bites, smoky flavor, and relaxed outdoor vibes that remind people of family evenings and weekend get-togethers. It’s the kind of meal you can pull together without stress, even on busy days. I usually start prepping the grill while chopping a few basics, and the smell alone sets the mood. This recipe keeps things cozy, practical, and full of flavor—perfect for sharing with loved ones or enjoying a quiet, nostalgic dinner at home.

    Why You Will Love This Recipe

    Looking for something that feels comforting but doesn’t take all day? This 90s cookout recipe brings together simple ingredients and bold, familiar flavors that feel both cozy and satisfying. It’s budget-friendly, easy to prepare, and flexible enough for whatever you already have in your kitchen. You can grill everything quickly, making it perfect for weeknight dinners or laid-back weekends. It’s also great for leftovers, so nothing goes to waste. Whether you’re cooking for your family or just want something warm and nostalgic, this meal fits right in with real life and busy routines.

    Ingredients

    Tip: Choose fresh ground beef with a bit of fat (like 80/20) for juicy burgers.

    • 500g ground beef
    • 4 burger buns
    • 2 large potatoes (cut into wedges)
    • 2 tbsp oil
    • 1 tsp salt
    • 1 tsp black pepper
    • 1 tsp paprika
    • 4 slices cheese
    • 1 onion (sliced)
    • 1 tomato (sliced)
    • Lettuce leaves
    • 2 tbsp ketchup
    • 2 tbsp mayonnaise

    For 2 people: simply halve all ingredients. For more than 4, double or increase gradually based on guests.

    Instructions

    Step 1: Preparation – 40 words
    Feeling unsure where to begin? Start by shaping the ground beef into four equal patties and seasoning them with salt, pepper, and paprika. Slice vegetables and soak potato wedges briefly in water to remove excess starch for better crisping.

    Step 2: Main Cooking Process – 40 words
    Worried about overcooking? Heat a grill pan or outdoor grill and cook patties for about 4–5 minutes per side until nicely browned and juicy inside. At the same time, fry or bake the potato wedges until golden and crispy.

    Step 3: Combining Ingredients – 40 words
    Not sure how to assemble everything? Lightly toast the buns, then layer each with lettuce, a hot patty, cheese slice, onion, and tomato. Add ketchup and mayonnaise evenly so each bite feels balanced and flavorful.

    Step 4: Finishing & Final Simmer – 40 words
    Want everything warm and ready together? Let the assembled burgers sit covered for a minute so the cheese melts gently. Serve immediately with hot wedges. For 2 servings, cook fewer patties; for larger groups, grill in batches.

    Why This Recipe Works for Busy Days

    Need something quick but still homemade? This recipe keeps prep simple and cooking fast, so you’re not stuck in the kitchen for long. You can even prep ingredients earlier in the day and cook when ready. Leftovers store well, making it a great option for next-day meals or quick reheats.

    Tips & Tricks

    • Wondering why burgers turn dry sometimes? Avoid pressing them while cooking, as this releases juices. Keep portions smaller if cooking for two, or make extra patties and freeze them if cooking for more than four people for future meals.
    • Not getting crispy wedges? Make sure they are dry before cooking and don’t overcrowd the pan. For fewer servings, cook in a smaller batch; for larger groups, bake in batches so they stay crisp instead of steaming.
    • Struggling with bland flavor? Season the patties well before cooking, not after. If making for more people, increase seasoning slightly instead of keeping it the same, so the flavor doesn’t get lost in bigger portions.
    • Want better melted cheese? Add it in the last minute of cooking and cover briefly. For smaller portions, use half slices if needed; for bigger servings, keep extra cheese ready so each burger gets equal richness.

    Variations

    Meaty version
    Thinking of making it more filling? Add grilled chicken or sausages alongside the burgers for a fuller 90s-style spread. Keep quantities balanced by reducing beef slightly for two people or adding extra protein portions when cooking for a crowd.

    Vegetarian option
    Looking for a meat-free version? Swap the beef patties with grilled veggie patties made from beans or potatoes. Adjust seasoning well, and cook fewer patties for two or double the mix if preparing for more than four servings.

    Ingredient swap
    Missing something at home? Use sweet potatoes instead of regular ones or swap mayonnaise with yogurt-based sauce. For smaller servings, keep swaps minimal; for larger groups, prepare extra sauce so everyone gets enough flavor.

    Flavor or herb boost
    Want a fresher taste? Add chopped coriander or a squeeze of lemon over the burgers before serving. For two people, a small pinch is enough; for bigger groups, increase herbs gradually so the flavor stays balanced and not overpowering.

    Serving Suggestions

    • Classic backyard plate
      Trying to keep it simple? Serve burgers with wedges and a cold drink on the side. It feels casual and comforting. For smaller servings, plate individually; for larger groups, arrange everything on a big tray for easy sharing.
    • Family-style spread
      Want everyone to build their own? Lay out buns, patties, veggies, and sauces separately so each person can assemble their burger. For two people, keep it minimal; for more, add extra toppings to make it fun and flexible.
    • Picnic-style serving
      Planning a relaxed meal? Wrap burgers in paper and pack wedges in containers for easy outdoor eating. Adjust portions by packing fewer items for two or doubling everything neatly for bigger gatherings.
    • Cozy dinner setup
      Looking for a warm indoor option? Serve everything on a large platter with soft lighting and simple sides. Keep portions light for smaller meals or expand with extra sides like salads when serving more people.

    Storage Instructions

    • Fridge storage
      Worried about leftovers? Store cooked patties and wedges separately in airtight containers in the fridge for up to 2 days. For smaller portions, use compact containers; for larger amounts, divide into portions so reheating stays easy.
    • Reheating
      Not sure how to reheat without drying out? Warm patties on a pan over low heat and reheat wedges in an oven for crispness. Reheat only what you need for two servings or take out larger portions if feeding more people.
    • Freezing
      Thinking of saving for later? Freeze uncooked patties individually so they don’t stick together. For two servings, freeze smaller portions; for bigger batches, label and store in groups to make cooking easier next time.
    • Make-ahead tips
      Want to save time later? Prepare patties and cut vegetables ahead of time and store in the fridge. For smaller meals, prep only what you need; for larger gatherings, do bulk prep to reduce last-minute work.

    Recipe Timing

    Prep Time: 15 minutes
    Cook Time: 20 minutes
    Rest Time: 5 minutes
    Total Time: 40 minutes

    Nutrition Information (Approximate)

    Wondering about calories? Each serving contains around 450–550 calories, depending on ingredients used. Protein ranges between 20–25g per serving. It also provides iron and energy from potatoes. Values are estimates and may vary based on portion size and ingredient choices.

    FAQs

    Can I make this ahead of time?
    Yes, you can prepare patties and slice veggies earlier. Store in the fridge and cook when needed.

    Why are my burgers dry?
    Overcooking or pressing them too much removes juices. Cook gently and avoid pressing.

    Can I use chicken instead of beef?
    Yes, ground chicken works well. Adjust seasoning slightly for better flavor.

    Why are my wedges not crispy?
    Too much moisture or overcrowding causes sogginess. Dry them well before cooking.

    How do I store leftovers?
    Keep in airtight containers in the fridge for up to 2 days. Reheat as needed.

    How can I adjust flavor?
    Add more spices or herbs gradually. For larger servings, increase seasoning slightly to maintain taste.

    Conclusion

    Missing those easy, feel-good meals from the past? This 90s cookout brings back that warm, simple joy with minimal effort and maximum flavor. It’s flexible enough for any household size and easy to adjust based on what you have. You can make it your own with small changes and still keep that nostalgic touch alive. Whether you’re cooking for family or just yourself, this recipe fits right into everyday life. Save it, try it, and enjoy a cozy meal that feels both familiar and satisfying.

    Recipe Card

    90s CooKout

    Recipe by adminCourse: Blog
    Servings

    4

    servings
    Prep time

    15

    minutes
    Cooking time

    20

    minutes
    Calories

    450–550

    kcal

    A simple and cozy grilled meal with juicy burgers and crispy wedges. Perfect for family dinners or relaxed evenings at home. Easy to adjust for any number of people.

    Ingredients

    • 500g ground beef (use 250g for 2 people, 1kg for 8)

    • 4 burger buns

    • 2 large potatoes (cut into wedges)

    • 2 tbsp oil

    • 1 tsp salt

    • 1 tsp black pepper

    • 1 tsp paprika

    • 4 slices cheese

    • 1 onion (sliced)

    • 1 tomato (sliced)

    • Lettuce leaves

    • 2 tbsp ketchup

    • 2 tbsp mayonnaise

    Directions

    • Shape beef into 4 patties and season with salt, pepper, and paprika. Slice vegetables and prepare potato wedges.
    • Cook patties on a grill or pan for 4–5 minutes per side. Cook wedges until golden and crispy.
    • Toast buns lightly, then add lettuce, patty, cheese, onion, tomato, and sauces.
    • Let burgers rest briefly so cheese melts, then serve hot with wedges.

      For 2 people, reduce all ingredients by half. For more than 4, increase ingredients evenly and cook in batches if needed.

  • Spring Cake

    Spring Cake

    Introduction

    Looking for a light dessert that feels fresh after heavy meals or busy days? Spring desserts often bring that soft, fruity comfort that makes everything feel a little easier. This Spring Cake is one of those simple treats you can bake without stress and still feel proud of serving. I usually make it when the weather starts to warm up and fresh fruits are everywhere. It has a soft crumb, gentle sweetness, and a fresh taste that fits family tea time, small gatherings, or even a quiet evening at home.

    Why You Will Love This Recipe

    Ever wished for a cake that feels light but still satisfying after every bite? This Spring Cake brings that balance without needing complicated steps or fancy tools. It’s soft, mildly sweet, and works beautifully with seasonal fruits like strawberries or peaches.

    Want something that fits both busy weekdays and relaxed weekends? This recipe is flexible, budget-friendly, and easy to adjust. You can bake a smaller portion for 2 people or double it for a bigger family gathering without changing the taste or texture much. It also stays soft for a couple of days, making it perfect for planned or last-minute treats. It’s the kind of cake you’ll want to save and remake again.

    Ingredients

    Looking for the best flour for a soft cake texture? Always use fresh all-purpose flour for a light and fluffy base.

    • All-purpose flour – 2 cups (for 2 people use 1 cup, for more than 4 people increase proportionally)
    • Sugar – 1 cup (adjust to ½ cup for 2 people)
    • Eggs – 3 large (use 2 for smaller batch)
    • Milk – 1 cup
    • Unsalted butter – ½ cup, melted
    • Baking powder – 2 tsp
    • Vanilla extract – 1 tsp
    • Fresh spring fruits (strawberries/blueberries) – 1 cup (optional topping or mix-in)

    Instructions

    Step 1: Preparation

    Looking for a smooth start without kitchen mess? Preheat your oven to 180°C and lightly grease a baking pan. In a bowl, mix flour and baking powder evenly so the cake rises properly. Crack eggs in a separate bowl and whisk lightly. If making for 2 people, use a smaller pan and reduce all ingredients by half for even baking.

    Step 2: Main Cooking Process

    Wondering how to get that soft, airy texture? Beat sugar and eggs until slightly fluffy, then slowly add melted butter and milk. Keep stirring gently so the mixture stays smooth. Avoid over-mixing, or the cake may turn dense. For larger servings, mix in batches to keep consistency even.

    Step 3: Combining Ingredients

    Not sure when to bring everything together? Slowly add dry ingredients into the wet mixture and fold gently until no lumps remain. Add vanilla extract and mix lightly. If you’re using fruits, fold them in carefully so they don’t break. For smaller portions, mix gently to avoid overworking the batter.

    Step 4: Finishing & Final Simmer

    Thinking about how long to bake it perfectly? Pour the batter into the pan and bake for 30–35 minutes until golden and a toothpick comes out clean. Let it cool slightly before serving. For bigger batches, add 5–10 extra minutes depending on thickness.

    Why This Recipe Works for Busy Days

    Need a dessert that doesn’t demand too much time after a long day? This cake comes together quickly with simple ingredients you probably already have. It’s perfect for prepping ahead and enjoying later with tea or coffee. Leftovers stay soft, making it great for next-day snacks or lunchbox treats.

    Tips & Tricks

    • Want your cake extra soft every time? Always bring eggs and milk to room temperature before mixing. Cold ingredients can affect texture and make the batter uneven. If cooking for fewer or more people, keep the same temperature rule to maintain consistent softness and rise.
    • Worried about a dry cake? Don’t overbake it. Check at 30 minutes and use a toothpick test. Every oven is different, so adjust time slightly if making a smaller or larger batch to avoid dryness or underbaking.
    • Want better fruit flavor? Toss fruits in a little flour before adding. This keeps them from sinking. For smaller cakes, reduce fruit quantity slightly so balance stays right.
    • Trying to scale the recipe? Mix in portions if doubling. This keeps batter smooth and prevents uneven texture when making larger Spring Cake batches.

    Variations

    • Want a richer version with more flavor depth? Add a meaty twist by serving this cake with a light cream cheese frosting layered on top. It doesn’t change the cake structure but adds a creamy contrast that works well for family gatherings or special weekend desserts.
    • Looking for a vegetarian-friendly upgrade? This Spring Cake is already egg-based but can be made egg-free using mashed banana or yogurt. It stays soft and works well for 2 or 4 servings with no major texture change if baked carefully.
    • Need ingredient swaps from pantry items? Replace butter with neutral oil for a lighter version. You can also use honey instead of sugar for a softer sweetness. Adjust quantity slightly when making smaller or larger portions.
    • Want a stronger flavor profile? Add lemon zest, cinnamon, or cardamom for a warm aromatic twist. It pairs beautifully with spring fruits and keeps the cake exciting even when scaled for more servings.

    Serving Suggestions

    • Looking for a cozy tea-time plate? Serve this cake slightly warm with black tea or milk tea. It works beautifully for small family servings, and you can easily double slices when hosting guests without changing presentation.
    • Want a refreshing dessert plate? Pair it with fresh whipped cream and seasonal fruits. This works especially well when serving 4 or more people at gatherings or weekend dinners.
    • Planning a kids’ snack idea? Cut into small squares and pack in lunchboxes. For larger families, bake in a tray and portion evenly for the whole week.
    • Want a simple party dessert? Dust with powdered sugar and serve on a large plate. It scales well, so you can bake more batches for bigger groups without losing softness.

    Storage Instructions

    • Need to store leftovers safely? Keep the cake in an airtight container at room temperature for up to 2 days. For warmer climates, refrigerate it to maintain freshness. If you made a smaller batch, it may finish faster due to softer texture.
    • Wondering how to reheat without drying it? Warm slices in the microwave for 10–15 seconds. This brings back softness. For larger portions, reheat in small batches so heat spreads evenly.
    • Want to freeze it for later? Wrap slices in cling film and freeze for up to 1 month. Thaw at room temperature before serving. Works well for both small and large batch baking.
    • Planning ahead for events? Bake the cake a day before and store covered. This helps flavors settle better, especially when making multiple servings for gatherings.

    Recipe Timing

    Prep Time: 15 minutes
    Cook Time: 35 minutes
    Rest Time: 10 minutes
    Total Time: 1 hour

    Nutrition Information (Approximate)

    Each serving of this cake contains around 280–320 calories, depending on ingredients used. Protein is approximately 5–7g per serving. It also provides carbohydrates for energy and small amounts of calcium from milk and butter. Values are estimates and may change based on portion size or ingredient adjustments.

    FAQs

    Can I make this Spring Cake ahead of time?
    Yes, you can bake it a day before and store it covered. It stays soft and tastes even better the next day.

    What is the most common mistake?
    Over-mixing the batter. It makes the cake dense instead of light and fluffy.

    Can I replace sugar with honey?
    Yes, but reduce liquid slightly so texture stays balanced and soft.

    Why is my cake too dry or too heavy?
    Usually from overbaking or too much mixing. Check oven time carefully and mix gently.

    How should I store leftovers?
    Keep in an airtight container. Refrigerate if you plan to store it for more than 2 days.

    Can I adjust sweetness easily?
    Yes, you can reduce or increase sugar depending on taste without affecting structure much.

    Conclusion

    Ever wanted a dessert that feels light, simple, and comforting all at once? This Spring Cake is exactly that kind of recipe you can keep coming back to. It works for small moments like tea time or bigger family gatherings without any stress. You can easily adjust ingredients, flavors, or portions depending on your needs, which makes it very flexible. Once you bake it, you’ll likely find yourself repeating it whenever you want something soft and fresh. The beauty of Spring Cake is how naturally it fits into everyday life without effort.

    Recipe Card

    Spring Cake

    Recipe by admin
    Servings

    4

    servings
    Prep time

    15

    minutes
    Cooking time

    35

    minutes
    Calories

    280–320

    kcal

    A soft, light seasonal cake made with simple pantry ingredients and fresh spring fruits. Perfect for tea time, family desserts, or casual gatherings.

    Ingredients

    • 2 cups all-purpose flour (½ cup for 2 people, scale up for more servings)

    • 1 cup sugar (½ cup for 2 people)

    • 3 large eggs (2 for smaller batch)

    • 1 cup milk

    • ½ cup unsalted butter, melted

    • 2 tsp baking powder

    • 1 tsp vanilla extract

    Directions

    • Preheat oven to 180°C and grease a baking pan. Mix flour and baking powder in a bowl.
    • Whisk eggs and sugar until slightly fluffy. Add milk and melted butter slowly.
    • Fold dry ingredients into wet mixture gently. Add vanilla and fruits if using.
    • Pour batter into pan and bake for 30–35 minutes until golden and set. Let cool before serving.

    .

  • Cupcakke

    Cupcakke

    Introduction

    Wondering what sweet treat you can bake without turning your whole kitchen upside down? Cupcakke is one of those soft, fluffy desserts that feels simple yet special every time you make it. These little cakes are loved for their light texture, creamy topping, and the way they fit into everyday moments—busy evenings, small family gatherings, or even a quiet tea break. I usually mix the batter while the oven preheats, and it always feels like a small win. They’re easy to customize, quick to bake, and perfect when you want something homemade without too much effort.

    Why You Will Love This Recipe

    Looking for something that feels homemade but doesn’t demand too much time or skill? This cupcakke recipe brings together soft texture, balanced sweetness, and a cozy feel that works for any day of the week. It’s simple enough for beginners but still satisfying for regular bakers who want something reliable.

    These are great for sharing, storing, or even freezing for later, which makes them a practical option for busy households. You can dress them up for guests or keep them plain for everyday treats. They’re also budget-friendly, using basic pantry ingredients you likely already have. Whether it’s a quick dessert or something to pack for later, these always feel like a good choice.

    Ingredients

    Not sure which flour works best? Use all-purpose flour for a soft, balanced texture.

    • 2 cups all-purpose flour
    • 1 cup sugar
    • ½ cup butter (softened)
    • 2 eggs
    • 1 cup milk
    • 1½ tsp baking powder
    • 1 tsp vanilla extract
    • ¼ tsp salt

    For 2 people: simply halve all ingredients.
    For more than 4 people: double or triple everything evenly.

    Instructions

    Step 1: Preparation – 40 words
    Feeling unsure about where to start? Preheat your oven to 180°C and line a muffin tray with paper cups. In a bowl, mix flour, baking powder, and salt. In another bowl, beat butter and sugar until light and creamy.

    Step 2: Main Cooking Process – 40 words
    Worried about getting the batter right? Add eggs one by one into the butter mixture, mixing gently. Pour in milk and vanilla extract. Slowly combine dry ingredients into the wet mixture until smooth but not overmixed.

    Step 3: Combining Ingredients – 40 words
    Not sure how full to fill each cup? Spoon the batter into cupcake liners, filling them about two-thirds full. If cooking for 2 people, use fewer cups; for larger batches, prepare extra trays instead of overfilling.

    Step 4: Finishing & Final Simmer – 40 words
    Wondering when they’re done? Bake for 18–20 minutes until the tops turn golden and a toothpick comes out clean. Let them cool before serving. For bigger batches, bake in rounds so each tray cooks evenly.

    Why This Recipe Works for Busy Days

    Need something quick that still feels homemade? These cupcakke come together fast and don’t require complicated steps. You can prepare the batter ahead or bake in batches. They store well, making them perfect for planning ahead or saving for later snacks.

    Tips & Tricks

    • Want softer cupcakes every time? Make sure your butter is at room temperature before mixing. Cold butter can lead to uneven texture. If making a smaller batch for 2 people, mix gently since smaller quantities can overblend quickly and affect softness.
    • Not sure why your cupcakes turn dense? Overmixing the batter is a common mistake. Stir just until combined. When doubling the recipe for more people, mix in batches instead of one large bowl to keep the texture light.
    • Struggling with uneven baking? Always fill each cup evenly so they cook at the same rate. For smaller servings, use a smaller tray instead of leaving empty slots, which can cause uneven heat distribution in the oven.
    • Want better flavor without extra effort? Add a pinch more vanilla or a light sprinkle of sugar on top before baking. When scaling up, don’t overdo flavoring—keep it balanced so every batch tastes consistent and not overpowering.

    Variations

    • Meaty Version
      Thinking of making it more filling? You can turn these into savory cupcakke by adding small pieces of cooked chicken or minced meat with herbs. Keep the batter slightly less sweet. For 2 people, use a small portion of meat; for larger groups, increase evenly.
    • Vegetarian Option
      Want a plant-based twist? Replace eggs with mashed banana or yogurt and use plant-based milk. The texture stays soft and moist. For smaller portions, adjust substitutes carefully so the batter doesn’t become too thick or heavy.
    • Ingredient Swap
      Missing an ingredient at home? You can swap butter with oil for a lighter texture or use brown sugar for a deeper taste. When making a larger batch, keep measurements consistent to avoid uneven flavor across different trays.
    • Flavor Boost
      Looking to change the flavor easily? Add cocoa powder for chocolate cupcakes or mix in lemon zest for freshness. If making for a crowd, divide batter into portions and flavor each one differently for variety without extra effort.

    Serving Suggestions

    • With Tea or Coffee
      Need a simple serving idea? These cupcakke pair beautifully with a warm cup of tea or coffee. For smaller servings, plate just a few with light dusting sugar. For larger groups, arrange them on a tray for easy sharing.
    • With Fresh Fruits
      Want something refreshing on the side? Serve with sliced strawberries, bananas, or seasonal fruits. It balances the sweetness nicely. For bigger gatherings, create a fruit platter alongside cupcakes for a colorful presentation.
    • With Cream Topping
      Thinking of making them a bit richer? Add whipped cream or simple frosting on top. For 2 people, keep it light; for larger batches, prepare extra topping separately so everyone can add as they like.
    • Dessert Platter Style
      Planning a cozy dessert setup? Serve these with biscuits, small cakes, or nuts on one tray. It works well for family evenings. Adjust quantities easily by adding or reducing items based on your group size.

    Storage Instructions

    • Fridge Storage
      Not sure how to keep leftovers fresh? Store cupcakke in an airtight container in the fridge for up to 3 days. For smaller portions, use compact containers to avoid drying out. For larger batches, separate layers with paper to keep them soft.
    • Reheating
      Want them warm again? Heat in the microwave for 10–15 seconds to bring back softness. If you made a big batch, reheat only what you need so the rest stays fresh and doesn’t lose texture.
    • Freezing
      Planning to store for longer? Wrap each cupcake individually and freeze for up to one month. For small servings, freeze just a few pieces. For large batches, label portions so you can take out exactly what you need.
    • Make-Ahead Tips
      Trying to save time later? You can prepare the batter a few hours in advance and keep it chilled. For larger gatherings, bake the cupcakes a day before and store properly, then add toppings fresh before serving.

    Recipe Timing

    Prep Time: 10 minutes
    Cook Time: 20 minutes
    Rest Time: 10 minutes
    Total Time: 40 minutes

    Nutrition Information (Approximate)

    Each serving of cupcakke contains around 180–220 calories, with 3–5g protein. It also provides small amounts of calcium and carbohydrates for energy. These values are estimates and may vary depending on ingredients and portion sizes used.

    FAQs

    Can I make these ahead of time?
    Yes, you can bake them a day before and store them in a sealed container. Adjust quantity based on your needs.

    Why are my cupcakes dense?
    Overmixing is usually the reason. Mix gently, especially when making smaller batches.

    Can I replace eggs?
    Yes, use yogurt or mashed banana as a substitute. Adjust consistency for small or large servings.

    Why are they dry?
    Overbaking can cause dryness. Check early, especially if making fewer cupcakes.

    How long can I store them?
    They last 2–3 days in the fridge or up to a month in the freezer.

    How can I adjust sweetness?
    Reduce sugar slightly or add more flavor like vanilla or cocoa depending on your taste.

    Conclusion

    Looking for a simple bake you can rely on again and again? Cupcakke is one of those recipes that fits easily into everyday life. It’s flexible, comforting, and easy to adjust whether you’re baking for two or a bigger group. You can keep it plain or experiment with flavors depending on your mood. Once you try it, it naturally becomes part of your routine. There’s something satisfying about having a homemade treat ready without too much effort. It’s the kind of recipe you’ll come back to whenever you want something warm, soft, and quietly comforting.

    Recipe Card

    Cupcakke

    Recipe by admin
    Servings

    4

    servings
    Prep time

    30

    minutes
    Cooking time

    40

    minutes
    Calories

    180–220

    kcal

    Soft, simple cupcakes that are easy to bake and perfect for everyday treats. Great for small or large batches with simple adjustments.

    Ingredients

    • 2 cups all-purpose flour (use 1 cup for 2 people, double for more servings)

    • 1 cup sugar

    • ½ cup butter (softened)

    • 2 eggs

    • 1 cup milk

    • 1 tsp vanilla extract

    • ¼ tsp salt

    Directions

    • Preheat oven to 180°C and line a cupcake tray with paper cups. Mix flour, baking powder, and salt in a bowl.
    • In another bowl, beat butter and sugar until creamy. Add eggs one at a time, then mix in milk and vanilla.
    • Combine dry and wet ingredients gently until smooth. Do not overmix.
    • Fill cupcake liners two-thirds full and bake for 18–20 minutes until golden. Cool before serving.


  • spring baked goods

    spring baked goods

    Introduction

    Are you looking for something soft, sweet, and fresh that feels just right for the spring season? These spring baked goods bring that light, comforting feeling into your kitchen with every bite. They are the kind of treats you can enjoy with morning tea, pack into lunchboxes, or serve when friends drop by unexpectedly. I usually bake them when I want something simple but still a little special. This recipe is easy, cozy, and made with everyday ingredients that turn into something warm and inviting.

    Why You Will Love This Recipe

    Do you ever wish you had a bake that feels fresh but still comforting at the same time? These spring baked goods are soft, lightly sweet, and full of bright flavor that feels perfect for the season. They are simple enough for weekdays but pretty enough for small gatherings. You can make them ahead, freeze them, or enjoy them warm from the oven. The best part is how flexible they are—easy to adjust for small families or larger groups without stress. They also use budget-friendly ingredients you likely already have at home.

    Ingredients

    Do you want to know what makes these baked treats so soft and flavorful? The secret is using fresh lemons and juicy berries for a light spring touch.

    • 2 cups all-purpose flour
    • 1 cup fresh or frozen mixed berries (blueberries, raspberries, or strawberries)
    • 2 large eggs
    • 3/4 cup sugar
    • 1/2 cup melted butter
    • 1 cup milk
    • 1 tablespoon lemon zest
    • 2 tablespoons lemon juice
    • 2 teaspoons baking powder
    • 1/2 teaspoon salt
    • 1 teaspoon vanilla extract

    For 2 people, simply cut all ingredients in half. For more than 4 people, double the ingredients while keeping baking time slightly adjusted if baking in multiple batches.

    Instructions

    Step 1: Preparation (40 words)

    Are you unsure how to start baking without making a mess? Preheat the oven to 180°C and line your muffin tray. Whisk eggs, sugar, milk, butter, vanilla, lemon zest, and lemon juice until smooth. This base sets the flavor for your spring baked goods.

    Step 2: Main Cooking Process (40 words)

    Are you worried about getting the texture right? In another bowl, mix flour, baking powder, and salt. Slowly add dry ingredients into the wet mixture. Stir gently until just combined. Do not overmix or your baked goods may turn dense instead of soft.

    Step 3: Combining Ingredients (40 words)

    Do you want berries evenly spread without sinking? Fold in the mixed berries carefully so they stay whole. The batter should look thick but soft. If making half portion for 2 people, reduce berries and batter equally so texture stays balanced.

    Step 4: Finishing & Final Simmer (40 words)

    Are you unsure when they are perfectly baked? Spoon batter into trays and bake for 20–25 minutes until golden and fragrant. A toothpick should come out clean. Let them cool slightly before serving so the flavors settle nicely in your spring baked goods.

    Why This Recipe Works for Busy Days

    Are you struggling to find time for baking during a busy week? These treats come together quickly and don’t require fancy tools or long prep. You can mix everything in one bowl and bake in under 30 minutes. They also store well, making them perfect for planning ahead or enjoying later without extra effort.

    Tips & Tricks

    • Are you worried about dry baked goods? Always measure flour lightly and avoid packing it too tightly. Overmixing the batter can make them heavy instead of soft. If you’re baking for fewer people, reduce mixing time slightly to keep texture light and fluffy.
    • Do your berries always sink to the bottom? Toss them in a little flour before adding to the batter. This helps them stay evenly spread. If scaling up for more servings, gently fold berries in batches so they distribute properly without breaking.
    • Are your muffins not rising well? Make sure your baking powder is fresh and active. Also avoid opening the oven too early. For smaller batches, reduce baking time slightly, but keep the temperature the same for even rising.
    • Want extra flavor without changing the recipe too much? Add a pinch of cinnamon or almond extract. It blends beautifully with spring flavors. When doubling the recipe, keep flavor add-ins subtle so they don’t overpower the light taste.

    Variations

    • Are you looking for a richer version with more depth? Add white chocolate chips and a touch of cream cheese filling for a soft, indulgent twist. This works well for family gatherings. If scaling up, keep chocolate light so sweetness stays balanced across all servings.
    • Do you prefer a vegetarian-friendly variation that still feels fresh? This recipe already fits vegetarian needs, but you can swap milk with almond or oat milk for a lighter touch. It still keeps the spring baked goods soft and moist without changing structure.
    • Want to change ingredients based on what’s in your kitchen? Replace mixed berries with chopped apples or pears. This gives a slightly different texture but keeps the same cozy feel. For smaller portions, use one fruit only to keep flavor simple and balanced.
    • Looking for stronger spring flavor? Add fresh mint or basil finely chopped into the batter. It gives a refreshing herbal note that pairs well with lemon. When making larger batches, add herbs slowly to avoid overpowering the base flavor.

    Serving Suggestions

    • Are you thinking about a cozy breakfast idea? Serve these warm with butter or honey alongside tea or coffee. They feel light but filling, perfect for slow mornings. For larger groups, arrange them on a tray with fresh fruit for a simple brunch table.
    • Want a dessert-style serving option? Pair them with whipped cream or vanilla yogurt. The soft texture blends nicely with creamy sides. If serving fewer people, just warm a couple pieces and keep the rest stored for later enjoyment.
    • Looking for something kids will love? Pack them into lunchboxes with a small juice box or milk. They stay soft for hours. For bigger families, bake extra and freeze portions so snacks are always ready.
    • Need something for guests? Arrange them on a serving plate with a dusting of powdered sugar. They look beautiful and taste even better warm. You can easily double the recipe for gatherings without losing texture or freshness.

    Storage Instructions

    • Do you want to keep them fresh for the next few days? Store in an airtight container in the fridge for up to 4 days. For smaller batches, use a small container to avoid moisture buildup that can affect texture.
    • Are you planning to reheat them later? Warm in the microwave for 10–15 seconds or in the oven for a few minutes. This brings back the soft texture. For larger batches, reheat only what you need to avoid drying out the rest.
    • Want to freeze extras for busy days? Wrap each piece individually and freeze for up to 2 months. This works well for both small and large portions. Thaw at room temperature before reheating for best taste.
    • Thinking of making them ahead of time? You can prepare the batter a few hours early and keep it refrigerated. Bake fresh when needed for best rise and flavor. This is useful when cooking for guests or larger family meals.

    Recipe Timing

    Prep Time: 15 minutes
    Cook Time: 25 minutes
    Rest Time: 10 minutes
    Total Time: 50 minutes

    Nutrition Information (Approximate)

    Are you wondering about the nutritional value of these baked treats? Each serving contains around 220–260 calories depending on ingredients used. Protein is approximately 5–7 grams per serving. They also provide carbohydrates and small amounts of fiber from berries. These values are estimates and may vary based on portion size and substitutions.

    FAQs

    Are these baked goods good for making ahead?
    Yes, you can prepare them a day before. Store in an airtight container and warm slightly before serving for best texture.

    What is the most common mistake when baking them?
    Overmixing the batter is the most common issue. It can make the texture heavy instead of soft and fluffy.

    Can I replace berries with other fruits?
    Yes, apples, pears, or even cherries work well. Just keep the same quantity for balanced texture.

    Why are my baked goods too dense?
    This usually happens from too much mixing or old baking powder. Mix gently and use fresh ingredients for best results.

    How should I store leftovers?
    Keep them in the fridge in a sealed container. They stay fresh for several days and can be reheated easily.

    Can I make them less sweet?
    Yes, reduce sugar slightly without changing other ingredients. The natural fruit still keeps a pleasant flavor.

    Conclusion

    Do you want a simple recipe that feels fresh, cozy, and perfect for any spring day? These spring baked goods bring that balance of softness and light fruity flavor that fits every mood. They are easy to customize, easy to store, and easy to share with family or friends. Once you try them, you’ll find yourself baking them again with small changes each time. Whether for breakfast, snacks, or a sweet moment in the day, they always feel just right.

    Recipe Card

    spring baked goods

    Recipe by admin
    Servings

    4

    servings
    Prep time

    15

    minutes
    Cooking time

    25

    minutes
    Calories

    220–260

    kcal

    A soft, light, and fruity baked treat made with lemon zest and mixed berries. Perfect for spring mornings, snacks, or sharing with family.

    Ingredients

    • 2 cups all-purpose flour

    • 1 cup mixed berries

    • 2 eggs

    • 3/4 cup sugar

    • 1/2 cup melted butter

    • 1 cup milk

    • 1 tbsp lemon zest

    • 2 tbsp lemon juice

    • 2 tsp baking powder

    • 1/2 tsp salt

    • 1 tsp vanilla extract

    • To adjust: halve for 2 people or double for more than 4.

    Directions

    • Preheat oven to 180°C and prepare muffin tray. Mix wet ingredients until smooth.
    • Combine dry ingredients in another bowl. Slowly add to wet mix and stir gently.
    • Fold in berries carefully without overmixing.
    • Fill trays and bake 20–25 minutes until golden and set. Cool before serving.

  • Spring Birthday Cake

    Spring Birthday Cake

    Introduction

    Are you looking for a birthday cake that feels light, fresh, and a little special for spring gatherings? A spring birthday cake is exactly that kind of dessert that brings soft colors, airy texture, and a comforting sweetness to the table without feeling heavy. It’s the kind of cake you can serve at family birthdays, garden parties, or even a simple weekend celebration at home. I like making it when I want something cheerful but not complicated, especially when the weather starts turning warm and bright.

    Why You Will Love This Recipe

    Do you ever wish for a cake that looks beautiful but doesn’t stress you out in the kitchen? This spring birthday cake brings soft sponge layers, light cream, and gentle flavors that feel perfect for the season. It’s easy to prepare, budget-friendly, and flexible enough for different celebrations. You can make it ahead, chill it, and it still tastes fresh the next day. Leftovers also stay soft, which makes it great for small households. This spring birthday cake is the kind of dessert people quietly go back for seconds without even thinking.

    Ingredients

    Are you unsure which ingredients make a cake feel soft and spring-like? For the best texture, use fresh eggs and room-temperature butter so everything blends smoothly and rises evenly.

    • 4 large eggs (for 2 people, use 2 eggs; for 6–8 people, double the recipe)
    • 150g sugar
    • 150g all-purpose flour
    • 1 tsp baking powder
    • 100g unsalted butter, softened
    • 120ml milk
    • 1 tsp vanilla extract
    • 200ml whipped cream (for topping)
    • Fresh strawberries or seasonal fruits for decoration

    Instructions

    Step 1: Preparation

    Are you wondering how to start without feeling rushed? Preheat your oven to 180°C and grease a round cake pan. In a bowl, beat eggs and sugar until light and fluffy. If making a smaller cake for 2 people, reduce everything by half for a thinner layer.

    Step 2: Main Cooking Process

    Are you worried the cake might turn dense? Gently mix flour, baking powder, and butter into the egg mixture, then slowly add milk and vanilla. Stir just until smooth to keep the batter airy and soft.

    Step 3: Combining Ingredients

    Are you unsure when everything comes together properly? Pour the batter into your prepared pan and smooth the top lightly. Tap the pan once to remove air bubbles before baking for even texture.

    Step 4: Finishing & Final Simmer

    Are you waiting for the perfect bake without overdoing it? Bake for 25–30 minutes until golden and springy to touch. Let it cool fully before adding whipped cream and fresh fruit for that soft spring finish.

    Why This Recipe Works for Busy Days

    Are you short on time but still want a homemade celebration cake? This spring birthday cake works well because it can be baked ahead and stored without losing softness. It stays moist for days and can even be prepared in parts. Whether you’re baking for 2 people or a full group of 8, it adjusts easily and still feels fresh and light every time.

    Tips & Tricks

    • Are you struggling with a flat cake? Always beat eggs and sugar until pale and fluffy because this builds structure. Avoid overmixing after adding flour, or the cake may turn dense. For smaller or larger servings, keep the same mixing method but adjust baking time slightly depending on thickness.
    • Are you worried about dryness? Do not overbake the sponge. Check the cake 5 minutes early, especially if making a smaller version. For larger cakes, extend baking slowly rather than increasing heat, so the inside stays soft and even.
    • Are your toppings sliding off? Make sure the cake is completely cool before adding cream. If making extra portions, chill each layer separately for better stability and easier assembly.
    • Are you unsure about sweetness balance? Taste your cream before layering. You can slightly reduce sugar if serving kids or increase fruit topping for a fresher bite. Adjust sweetness more gently when scaling up for larger groups.

    Variations

    • Are you craving a richer version for adults? Add a light layer of chocolate cream between the sponge layers while keeping the spring birthday cake base unchanged. This gives a deeper flavor while still keeping the soft seasonal feel. Works well for 4 or 6 servings without changing baking time.
    • Are you looking for a vegetarian-friendly option? This recipe is already egg-based and can be made fully vegetarian by using plant-based whipped cream. It keeps the same structure and works well whether you are baking for 2 or a bigger gathering.
    • Are you missing an ingredient at home? Swap butter with light vegetable oil for a softer crumb. The texture stays moist and works perfectly for both small and large versions of this spring birthday cake.
    • Are you wanting a floral twist? Add a hint of lemon zest or rose water for a fresh spring aroma. It lifts the flavor beautifully without changing baking time or serving size adjustments.

    Serving Suggestions

    • Are you serving this for a family birthday table? Pair slices of spring birthday cake with fresh strawberries and a light tea. It feels cozy and balanced, and you can easily double portions for larger family gatherings or reduce for small celebrations.
    • Are you planning a garden party? Serve chilled cake slices with iced drinks and fruit bowls. The light texture fits outdoor settings, and you can scale servings up without changing the soft, airy feel of the cake.
    • Are you preparing a kids’ party? Add colorful sprinkles or soft fruit toppings. The mild sweetness works well for children, and smaller slices can be made easily if you’re only serving a few guests.
    • Are you making a quiet weekend dessert? Serve it with coffee or warm milk. Even a half portion of spring birthday cake feels satisfying, and leftovers stay fresh for next-day treats.

    Storage Instructions

    • Are you wondering how long it stays fresh? Keep the cake in an airtight container in the fridge for up to 3 days. For larger cakes, slice before storing so it chills evenly and stays soft.
    • Are you planning to reheat it? This cake is best served cold or at room temperature. If needed, leave it outside the fridge for 10–15 minutes before serving to restore softness without drying it out.
    • Are you thinking of freezing it? You can freeze sponge layers without cream for up to 1 month. Wrap well in portions so you can thaw only what you need, whether for 2 people or a full group.
    • Are you preparing ahead for a party? Bake the sponge a day earlier and store it covered. Add cream and fruits just before serving to keep the spring birthday cake fresh and stable.

    Recipe Timing

    Are you planning your baking schedule in advance?
    Prep Time: 15 minutes
    Cook Time: 30 minutes
    Rest Time: 20 minutes cooling
    Total Time: 65 minutes

    Nutrition Information (Approximate)

    Are you curious about what each slice contains? One serving of spring birthday cake is around 280–320 calories, depending on toppings. It provides moderate carbohydrates, small protein from eggs and milk, and natural sugars from fruits. These values are estimates and may vary based on portion size and ingredient changes.

    FAQs

    • Can I make it ahead of time?
      Yes, you can bake the sponge a day before and add cream before serving for best freshness.
    • Why did my cake turn dense?
      It usually happens from overmixing the batter or skipping proper egg whipping.
    • Can I replace flour with gluten-free flour?
      Yes, but choose a baking-friendly blend for better structure and soft texture.
    • Why is my cake too dry?
      It may be slightly overbaked, so always check a few minutes early.
    • How do I store leftovers safely?
      Keep them in an airtight container in the fridge and consume within 3 days.
    • Can I adjust sweetness?
      Yes, reduce sugar slightly or add more fruit topping for a lighter taste.

    Conclusion

    Are you ready to bake something that feels light, happy, and perfect for celebrations? This spring birthday cake brings together soft sponge, fresh cream, and seasonal fruits in a way that feels simple but special. You can easily adjust it for small family moments or bigger birthday gatherings without losing its charm. It’s one of those recipes you can return to whenever you want something comforting yet fresh. Once you try it, you may find yourself making it again for different occasions, just to enjoy that soft spring feeling all over again.

    Recipe Card

    Spring Birthday Cake

    Recipe by admin
    Servings

    4

    servings
    Prep time

    15

    minutes
    Cooking time

    30

    minutes
    Calories

    280–320

    kcal

    A soft, airy cake made with fluffy sponge layers, light cream, and fresh seasonal fruits. Perfect for spring celebrations, birthdays, and cozy family gatherings.

    Ingredients

    • 4 large eggs (halve for 2 people, double for 6–8 people)

    • 150g sugar

    • 150g all-purpose flour

    • 1 tsp baking powder

    • 100g unsalted butter (softened)

    • 120ml milk

    • 1 tsp vanilla extract

    • 200ml whipped cream

    • Fresh strawberries or seasonal fruits

    Directions

    • Preheat oven to 180°C and prepare a greased cake pan.
    • Whisk eggs and sugar until light and fluffy.
    • Add flour, baking powder, butter, milk, and vanilla; mix gently.
    • Pour batter into pan and bake for 25–30 minutes.
    • Cool completely before adding whipped cream and fruit topping.