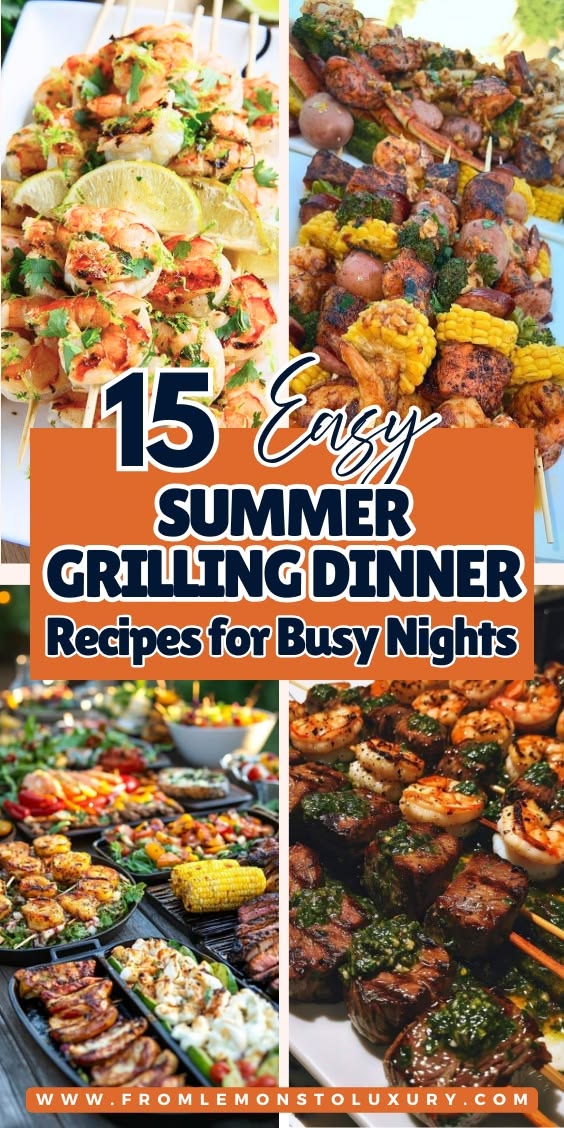
Author: admin

  • Soup Recipes That Warm You Up Instantly

    Soup Recipes That Warm You Up Instantly

    Introduction

    Feeling tired after a long day and craving something warm? Soup Recipes That Warm You Up Instantly are the kind of meals that make cold evenings feel softer and busy nights easier. A cozy bowl of soup can turn simple pantry ingredients into something filling, comforting, and deeply satisfying without much effort. I often keep a pot simmering when the weather turns chilly because it makes dinner feel calm and stress-free. These soups work beautifully for family meals, lazy weekends, or quick weeknight dinners when nobody wants complicated cooking. They are easy to adjust, budget-friendly, and comforting enough to save and make again all season long.

    Why You Will Love This Recipe

    Need something comforting that does not take all evening to make? This soup recipe brings together rich flavor, simple ingredients, and easy cooking steps that fit into real life. The broth turns silky and hearty while the vegetables soften into a warm, cozy bowl that feels homemade in the best way.

    If your evenings get hectic, this recipe works well because it reheats beautifully and tastes even better the next day. It is freezer-friendly, family-friendly, and flexible enough for whatever ingredients you already have nearby. These Soup Recipes That Warm You Up Instantly also stretch easily for larger dinners without making cooking stressful. Whether you are feeding two people quietly at home or serving a hungry group, the recipe stays simple, filling, and comforting every single time.

    Ingredients

    Choosing fresh vegetables with firm texture helps the soup stay hearty instead of turning mushy during simmering.

    • 2 tablespoons olive oil
    • 1 medium onion, chopped
    • 3 garlic cloves, minced
    • 2 medium carrots, sliced
    • 2 celery stalks, sliced
    • 2 medium potatoes, diced
    • 1 cup shredded cooked chicken
    • 6 cups chicken broth
    • 1 cup milk or light cream
    • 1 teaspoon salt
    • 1/2 teaspoon black pepper
    • 1 teaspoon dried thyme
    • 1 cup corn kernels
    • 1 tablespoon butter
    • 2 tablespoons chopped parsley

    For 2 people, simply cut most ingredients in half. For larger family meals, double the broth and vegetables first, then adjust seasoning slowly while tasting.

    Instructions

    Step 1: Preparation

    Wondering how to make prep feel easier on busy evenings? Chop all vegetables into small even pieces so they cook evenly and quickly. If cooking for only 2 people, use a smaller pot to avoid overcooking. For larger batches, prepare extra broth before starting to keep the soup balanced.

    Step 2: Main Cooking Process

    Concerned about getting enough flavor without complicated steps? Heat olive oil and butter in a large pot over medium heat. Cook onion, carrots, and celery until soft and fragrant. Stir in garlic and thyme until the kitchen smells warm and savory without letting the garlic brown too much.

    Step 3: Combining Ingredients

    Not sure when the soup starts coming together properly? Add potatoes, chicken, corn, salt, pepper, and broth. Let everything simmer gently until the potatoes become tender and the broth turns slightly rich-looking. If making extra servings, extend simmering time slightly so the larger amount cooks evenly.

    Step 4: Finishing & Final Simmer

    Worried the soup may turn too thick or heavy? Pour in the milk or cream slowly while stirring. Simmer gently for a few more minutes until the broth looks creamy and smooth. Sprinkle parsley on top just before serving for a fresh finish and brighter flavor.

    Why This Recipe Works for Busy Days

    Need dinner that still feels homemade after a packed schedule? This soup saves time because most ingredients cook together in one pot with very little cleanup. It stores well for later meals, making it ideal for meal prep or next-day lunches. Pinterest users love recipes like this because they are easy to save, flexible for different serving sizes, and comforting enough to reheat on cold evenings without losing flavor or texture.

    Tips & Tricks

    • Struggling with bland soup that tastes flat after simmering? Add a small pinch of salt near the end instead of all at once. This helps the flavors stay balanced. When making soup for only 2 people, reduce seasoning carefully because smaller batches can become salty faster than large pots.
    • Worried about vegetables turning too soft during cooking? Cut potatoes and carrots slightly larger if you plan to freeze leftovers later. For bigger family portions, avoid overcrowding the pot because vegetables need room to simmer evenly without breaking apart too quickly.
    • Finding creamy soups too heavy sometimes? Use half milk and half broth for a lighter texture while still keeping warmth and richness. If doubling the recipe for guests, add dairy gradually at the end instead of all together to keep the soup smooth and silky.
    • Frustrated when reheated soup becomes too thick the next day? Keep extra broth nearby and stir in a splash while warming leftovers. Smaller portions usually thicken faster in storage, while larger batches often need extra reheating time to become evenly hot throughout.

    Variations

    Meaty Version

    Want something even heartier for colder nights? Add browned sausage or shredded turkey along with the chicken for deeper flavor and a richer broth. This works especially well for larger family dinners because the extra protein makes the soup more filling without needing many additional ingredients or side dishes.

    Vegetarian Option

    Trying to make the soup meat-free without losing comfort? Replace chicken broth with vegetable broth and add white beans or mushrooms for texture. The soup still tastes warm and satisfying while staying budget-friendly. For 2 people, use fewer beans so the broth does not become overly thick during simmering.

    Ingredient Swap

    Missing a few vegetables in the kitchen? Sweet potatoes, peas, or zucchini can easily replace regular potatoes or corn depending on what you have nearby. This keeps the recipe flexible and practical for weeknight cooking. Larger batches may need slightly more seasoning after swapping ingredients with milder flavor.

    Flavor or Herb Boost

    Want the soup to taste a little fresher or cozier? Add rosemary, smoked paprika, or a squeeze of lemon near the end of cooking. Fresh herbs brighten the creamy broth beautifully. If making a bigger pot for gatherings, add herbs gradually so the flavor does not overpower the soup.

    Serving Suggestions

    • Crusty Bread on the Side
      Need an easy way to make dinner feel extra cozy? Serve the soup with thick slices of warm crusty bread for dipping into the creamy broth. For smaller households, toast just enough bread for the meal. Larger family dinners pair well with a full bread basket placed at the center of the table.
    • Simple Green Salad
      Looking for something fresh beside a warm bowl of soup? A crisp salad with light dressing balances the creamy texture beautifully. This combination works especially well for casual weeknight dinners because it feels filling without becoming too heavy, whether serving two people quietly or feeding several guests together.
    • Roasted Chicken Pairing
      Want to stretch the soup into a heartier dinner? Serve smaller bowls beside roasted chicken pieces for a comforting meal that feels relaxed and homey. If cooking for more than 4 people, the soup can act as a starter while the chicken becomes the main centerpiece at the table.
    • Cozy Soup Bar Idea
      Trying to make family dinners more fun and flexible? Set out toppings like shredded cheese, parsley, crackers, or chili flakes so everyone can customize their bowl. This works wonderfully for larger groups because people naturally adjust portions and flavors based on their own preferences.

    Storage Instructions

    • Fridge Storage
      Worried about leftovers losing flavor overnight? Let the soup cool fully before placing it into airtight containers. It stays fresh in the refrigerator for up to 4 days. Smaller portions cool faster and reheat more evenly, while larger batches should be divided into several containers for safer storage.
    • Reheating
      Concerned the creamy broth may separate while warming? Reheat the soup slowly over medium-low heat and stir gently every few minutes. Add a splash of broth or milk if it becomes too thick. Single servings warm quickly, while larger pots need extra stirring so the center heats evenly.
    • Freezing
      Need a freezer-friendly meal for future busy nights? Freeze the soup before adding cream if possible because dairy can sometimes change texture after thawing. Store portions in freezer-safe containers for up to 2 months. Smaller containers are practical because they thaw faster and reduce waste later.
    • Make-Ahead Tips
      Trying to save cooking time during the week? Chop vegetables and cook the chicken a day ahead so dinner comes together quickly later. You can also prepare the full soup in advance because the flavors deepen overnight. For larger meal prep batches, keep dairy separate until reheating day.

    Recipe Timing

    Prep Time: 15 minutes
    Cook Time: 30 minutes
    Rest Time: 5 minutes
    Total Time: 50 minutes

    Nutrition Information (Approximate)

    Trying to keep meals balanced without complicated tracking? Each serving contains around 320–380 calories with approximately 18–22 grams of protein, depending on ingredients used. The soup also provides fiber from vegetables and calcium from milk or cream. Nutrition values are estimates only and may vary based on portion size, ingredient swaps, or added toppings.

    FAQs

    Can I make this soup ahead of time?

    Yes, the flavor becomes even better after resting overnight in the fridge.

    Why did my soup turn too thick?

    Potatoes naturally thicken the broth while sitting. Add extra broth during reheating.

    Can I use rotisserie chicken?

    Absolutely. It saves time and works well for both small and large batches.

    How do I make the soup creamier?

    Stir in extra milk or cream during the final simmering stage.

    Can leftovers be frozen?

    Yes, but creamy soups freeze best when dairy is added after thawing.

    How can I make the flavor stronger?

    Add extra herbs, black pepper, or a little garlic near the end of cooking.

    Conclusion

    Need a dinner that feels warm, easy, and comforting without much effort? These Soup Recipes That Warm You Up Instantly are the kind of meals people come back to again and again because they fit real life so well. The recipe is flexible, cozy, and simple enough for both quiet nights and family dinners. You can change the vegetables, adjust the creaminess, or make bigger batches for leftovers without losing that homemade feeling. Once you make a pot and smell the broth simmering in the kitchen, it quickly becomes one of those comforting recipes worth saving for every cold evening ahead.

    Recipe Card

    Soup Recipes That Warm You Up Instantly

    Recipe by admin
    Servings

    4

    servings
    Prep time

    15

    minutes
    Cooking time

    30

    minutes
    Calories

    320–380

    kcal

    A warm and comforting soup filled with tender vegetables, creamy broth, and shredded chicken. This easy recipe is perfect for busy evenings, cozy weekends, or simple family dinners when you want something filling without extra work.

    Ingredients

    • 2 tablespoons olive oil

    • 1 medium onion, chopped

    • 3 garlic cloves, minced

    • 2 medium carrots, sliced

    • 2 celery stalks, sliced

    • 2 medium potatoes, diced

    • 1 cup shredded cooked chicken

    • 6 cups chicken broth

    • 1 cup milk or light cream

    • 1 teaspoon salt

    • 1/2 teaspoon black pepper

    • 1 teaspoon dried thyme

    • 1 cup corn kernels

    • 1 tablespoon butter

    • 2 tablespoons chopped parsley

    Directions

    • Heat olive oil and butter in a large pot over medium heat. Add onion, carrots, and celery. Cook until soft and fragrant.
    • Stir in garlic and thyme. Cook for about 1 minute until the aroma becomes warm and savory.
    • Add potatoes, chicken, corn, salt, pepper, and broth. Simmer gently until the potatoes become tender.
    • Pour in the milk or cream slowly while stirring. Let the soup simmer a few more minutes until creamy and smooth.
    • Sprinkle parsley on top before serving warm.
    • If reheating leftovers later, add a splash of broth to loosen the soup if needed.

  • Comfort Food Recipes That Feel Like Home

    Comfort Food Recipes That Feel Like Home

    Introduction

    Feeling tired after a long day and craving something warm and filling? Comfort food has a way of making busy evenings feel softer and quieter, especially when the kitchen starts smelling rich and cozy. These creamy chicken and potato skillet bowls bring together tender chicken, buttery potatoes, and a simple homemade sauce that feels familiar in the best way. Comfort Food Recipes That Feel Like Home are loved because they use simple ingredients without making dinner feel boring. I usually make this on colder nights when everyone wants something hearty without spending hours cooking. It is easy enough for weekdays but still feels special when shared around the table.

    Why You Will Love This Recipe

    Need a dinner that feels comforting without creating a sink full of dishes? This recipe keeps things simple while still tasting rich, creamy, and satisfying. The chicken stays juicy, the potatoes turn soft and buttery, and the sauce brings everything together in one cozy skillet meal.

    Comfort Food Recipes That Feel Like Home work so well because they fit real life. This recipe is weeknight-friendly, budget-friendly, and easy to save for later meals. Leftovers warm up beautifully the next day, which makes lunch feel just as comforting. It also freezes well when you want to prep ahead for busy weeks.

    The best part is how flexible it feels. You can make a smaller batch for two people without much effort, or double everything naturally when feeding a larger family gathering.

    Ingredients

    Choosing waxy potatoes helps them stay soft without falling apart while cooking.

    • 1½ pounds baby potatoes, halved
    • 1½ pounds boneless chicken thighs, cut into chunks
    • 2 tablespoons butter
    • 1 tablespoon olive oil
    • 1 small onion, diced
    • 3 garlic cloves, minced
    • 1 teaspoon salt
    • ½ teaspoon black pepper
    • 1 teaspoon paprika
    • 1 teaspoon dried thyme
    • 2 cups chicken broth
    • 1 cup heavy cream
    • 1 cup shredded cheddar cheese
    • 2 tablespoons chopped parsley

    For 2 people, simply cut most ingredients in half and use a smaller skillet. For more than 4 people, double the ingredients and allow a little extra simmer time.

    Instructions

    Step 1: Preparation

    Wondering how to keep dinner prep quick on a busy evening? Wash and halve the potatoes, chop the onion, and cut the chicken into bite-sized pieces. Pat the chicken dry so it browns better. If cooking for two people, use fewer potatoes to keep the texture balanced.

    Step 2: Main Cooking Process

    Need the chicken to stay tender instead of dry? Heat butter and olive oil in a large skillet over medium heat. Cook the chicken until lightly golden and fragrant. Add onions, garlic, potatoes, and seasonings. Stir gently until the onions soften and everything smells warm and savory.

    Step 3: Combining Ingredients

    Trying to avoid a watery sauce? Pour in the chicken broth and let the potatoes simmer until fork-tender. Lower the heat before adding cream and cheddar cheese. Stir slowly as the sauce thickens into a smooth, creamy mixture that coats the chicken and potatoes evenly.

    Step 4: Finishing & Final Simmer

    Want the flavors to feel deeper and more comforting? Let everything simmer gently for a few extra minutes until the sauce looks glossy and rich. Sprinkle parsley on top before serving. Larger batches may need another 5 minutes so the potatoes cook evenly through the center.

    Why This Recipe Works for Busy Days

    Need something filling without spending your whole evening cooking? This meal comes together in one skillet, which means less cleanup and easier cooking after long days. The leftovers store well for lunches, and the creamy sauce stays comforting even after reheating. Pinterest users love recipes like this because they can save the idea now and cook it later when they need an easy family dinner that still feels homemade.

    Tips & Tricks

    • Wondering why potatoes sometimes stay firm in creamy dishes? Cut them into similar sizes so they cook evenly. Tiny pieces may turn mushy while large chunks stay hard in the center. If cooking for two people, smaller batches cook faster, so check tenderness a little earlier.
    • Struggling with dry chicken in skillet meals? Chicken thighs work better than chicken breast because they stay juicy during simmering. If using chicken breast, reduce the simmer time slightly. For larger family portions, brown the chicken in batches instead of overcrowding the pan.
    • Curious how to keep creamy sauces smooth instead of grainy? Lower the heat before adding cheese and stir slowly. High heat can separate the sauce. Smaller servings usually thicken quickly, while doubled recipes may need a few extra minutes for the sauce to settle properly.
    • Finding leftovers too thick the next day? Add a splash of broth or milk during reheating to loosen the sauce gently. When freezing larger portions, divide them into smaller containers so they cool faster and reheat more evenly later.

    Variations

    Meaty Version

    Want an even heartier dinner for colder evenings? Add cooked turkey sausage or shredded beef along with the chicken for a richer flavor. The extra meat makes the meal feel especially filling for larger families. If cooking only for two people, reduce the added meat slightly so the sauce stays creamy instead of heavy.

    Vegetarian Option

    Need a meat-free comfort meal that still feels cozy? Replace the chicken with mushrooms and white beans. Mushrooms give the dish a savory flavor while beans make it satisfying enough for dinner. Larger batches work well for meal prep because the vegetables hold their texture surprisingly well after reheating.

    Ingredient Swap

    Missing an ingredient but still want dinner on the table? Sweet potatoes can replace regular potatoes for a softer texture and slightly sweet flavor. Monterey Jack or mozzarella also work nicely instead of cheddar. Smaller portions may cook a bit faster depending on the potato variety you choose.

    Flavor or Herb Boost

    Looking for a deeper homemade flavor without extra work? Stir in fresh rosemary, a pinch of chili flakes, or roasted garlic near the end of cooking. Fresh herbs brighten the creamy sauce beautifully. If making extra servings for guests, herbs are an easy way to make the dish feel a little more special.

    Serving Suggestions

    • With Warm Bread
      Need an easy side that makes dinner feel complete? Serve this creamy skillet meal with warm crusty bread or soft dinner rolls. The bread helps soak up every bit of sauce, which makes the meal feel extra cozy. For smaller households, half a loaf is usually enough beside the rich dish.
    • With Roasted Vegetables
      Want to balance the creamy texture with something lighter? Roasted carrots, broccoli, or green beans pair beautifully with the rich sauce. Larger family dinners feel more colorful and filling when extra vegetables are added alongside the skillet.
    • Family-Style Table Setup
      Trying to make a regular dinner feel more relaxed and comforting? Bring the skillet straight to the table and let everyone serve themselves. A sprinkle of extra parsley and cheese on top makes it feel warm and inviting for both small family meals and larger gatherings.
    • With a Fresh Salad
      Looking for a simple contrast to the creamy flavors? A crisp salad with cucumbers and light dressing keeps the meal from feeling too heavy. If serving a crowd, adding salad is also an easy way to stretch the recipe naturally without making extra skillet portions.

    Storage Instructions

    • Fridge Storage
      Wondering how long leftovers stay fresh? Store cooled leftovers in an airtight container in the refrigerator for up to 4 days. Smaller portions cool faster and are easier to reheat later. If storing a large family batch, divide it into separate containers so the texture stays creamy and fresh.
    • Reheating
      Concerned about creamy sauces becoming too thick after chilling? Reheat gently on the stove or in the microwave with a splash of broth or milk. Stir halfway through so the sauce warms evenly. Smaller portions usually need only a few minutes while larger servings take longer.
    • Freezing
      Need an easy freezer dinner for another busy week? Freeze cooled portions in sealed freezer-safe containers for up to 2 months. The potatoes may soften slightly after thawing, but the flavor stays comforting and rich. Individual portions work especially well for quick lunches or smaller households.
    • Make-Ahead Tips
      Trying to save time before dinner hour starts? Chop the potatoes, onion, and chicken earlier in the day and keep them refrigerated separately. You can also prepare a double batch of sauce ahead of time. Larger make-ahead portions help simplify busy evenings later in the week.

    Recipe Timing

    Prep Time: 15 minutes
    Cook Time: 35 minutes
    Rest Time: 5 minutes
    Total Time: 55 minutes

    Nutrition Information (Approximate)

    Wondering what each serving includes? Each portion contains around 520–620 calories and approximately 28–35 grams of protein depending on the exact ingredients used. The dish also provides calcium from the cheese and potassium from the potatoes. Nutrition values are estimates and may vary based on portion size, ingredient brands, and substitutions.

    FAQs

    Can I make this recipe ahead of time?

    Yes. Prepare it earlier in the day and reheat gently before serving. The flavors become even richer after resting.

    Why did my sauce turn too thick?

    The sauce thickens as it cools. Add a splash of broth or milk while reheating to loosen it.

    Can I use chicken breast instead of thighs?

    Yes, but cook it a little less to avoid dryness. Smaller portions may finish cooking faster.

    What if my potatoes are still hard?

    Cut them into smaller pieces and simmer a bit longer with the lid on until tender.

    Can I freeze leftovers?

    Yes. Freeze cooled portions in airtight containers for up to 2 months for easy future meals.

    How can I make the flavor stronger?

    Add extra garlic, herbs, or a little paprika near the end of cooking for a warmer, deeper flavor.

    Conclusion

    Need a dinner that feels comforting without being complicated? This creamy chicken and potato skillet is one of those meals that brings warmth to the table with very little stress. It uses simple ingredients, flexible portions, and cozy flavors that work for quiet family dinners or busy evenings when everyone is hungry and tired. Comfort Food Recipes That Feel Like Home are special because they can be adjusted so easily to fit different households, leftovers, and personal tastes. Add extra herbs, swap ingredients, or serve it with your favorite sides. Sometimes the best meals are simply the ones that make everyone slow down and feel at home.

    Recipe Card

    Comfort Food Recipes That Feel Like Home

    Recipe by admin
    Servings

    4

    servings
    Prep time

    15

    minutes
    Cooking time

    30

    minutes
    Calories

    520–620

    kcal

    Ingredients

    • 1½ pounds baby potatoes, halved

    • 1½ pounds boneless chicken thighs, cut into chunks

    • 2 tablespoons butter

    • 1 tablespoon olive oil

    • 1 small onion, diced

    • 3 garlic cloves, minced

    • 1 teaspoon salt

    • ½ teaspoon black pepper

    • 1 teaspoon paprika

    • 1 teaspoon dried thyme

    • 2 cups chicken broth

    • 1 cup heavy cream

    • 1 cup shredded cheddar cheese

    • 2 tablespoons chopped parsley

      For 2 people, use about half the ingredients. For more than 4 people, double the ingredients and use a larger skillet.

    Directions

    • Wash and halve the potatoes. Chop the onion and cut the chicken into small pieces.
    • Heat butter and olive oil in a large skillet over medium heat. Cook the chicken until lightly golden.
    • Add onion, garlic, potatoes, salt, pepper, paprika, and thyme. Stir until the onions soften.
    • Pour in the chicken broth and simmer until the potatoes are tender.
    • Lower the heat and stir in the cream and cheddar cheese slowly until the sauce becomes creamy.
    • Let everything simmer for a few more minutes until thick and glossy.
    • Sprinkle paIf making a larger batch, allow a few extra minutes for the potatoes to cook fully.

      rsley on top and serve warm.
  • Healthy Lunch Recipes That Keep You Full

    Healthy Lunch Recipes That Keep You Full

    Introduction

    Struggling to stay full after lunch? Healthy Lunch Recipes That Keep You Full are the kind of meals that make busy afternoons feel a little easier without leaving you hungry an hour later. These lunches are built with simple ingredients, hearty textures, and balanced flavors that work well for workdays, school lunches, or slow weekends at home. I usually keep these meals in rotation when I need something comforting but still light enough for the middle of the day. They are filling without feeling heavy, easy to prep ahead, and flexible enough to fit whatever ingredients you already have sitting in the kitchen.

    Why You Will Love This Recipe

    Tired of lunches that feel boring halfway through the week? This recipe brings together warm grains, crisp vegetables, creamy dressing, and protein in a way that feels cozy while still staying fresh and practical. It is the kind of meal you can make once and enjoy for days without getting tired of it.

    Healthy Lunch Recipes That Keep You Full are especially helpful for packed weekdays because they store well, travel easily, and still taste good after reheating. The ingredients are budget-friendly and easy to swap depending on what you already have. It also works beautifully for meal prep because the flavors settle together nicely overnight. Whether you are cooking for yourself, your family, or a small gathering, this lunch stays satisfying and comforting without turning into extra work.

    Ingredients

    Wondering which grain holds up best for meal prep lunches? Brown rice works especially well because it stays hearty and chewy even after reheating.

    • 2 cups cooked brown rice
    • 2 boneless chicken breasts, diced
    • 1 tablespoon olive oil
    • 1 teaspoon garlic powder
    • 1 teaspoon paprika
    • 1 teaspoon salt
    • ½ teaspoon black pepper
    • 1 cup cucumber, chopped
    • 1 cup cherry tomatoes, halved
    • 1 avocado, sliced
    • 1 cup canned chickpeas, drained
    • 2 cups baby spinach
    • ½ cup plain Greek yogurt
    • 1 tablespoon lemon juice
    • 1 teaspoon honey
    • 1 tablespoon chopped parsley

    For 2 people, simply halve the ingredients. If serving more than 4 people, double the rice, vegetables, and protein while using a slightly larger pan for easier cooking.

    Instructions

    Step 1: Preparation

    Not sure how to keep lunch prep simple during busy mornings? Cook the brown rice ahead of time and let it cool slightly. Season the diced chicken with garlic powder, paprika, salt, and pepper while chopping the vegetables into bite-sized pieces for quick assembly later.

    Step 2: Main Cooking Process

    Worried about dry chicken ruining the meal? Heat olive oil in a large skillet over medium heat and cook the chicken until golden around the edges and fully cooked inside. The kitchen should smell warm and savory, with lightly crisp pieces forming in the pan.

    Step 3: Combining Ingredients

    Concerned about soggy meal-prep bowls? Add the rice, spinach, cucumber, tomatoes, chickpeas, and cooked chicken into a large bowl. Stir the yogurt, lemon juice, and honey separately before drizzling over everything so the vegetables stay fresh and crisp longer.

    Step 4: Finishing & Final Simmer

    Wondering how to make the flavors taste more balanced? Toss everything gently until coated, then top with avocado slices and parsley. Let the bowls rest for a few minutes before serving so the warm rice slightly softens the spinach without making it watery.

    Why This Recipe Works for Busy Days

    Need lunches that still taste good after a long day? This recipe works beautifully for meal prep because every ingredient holds its texture well in the fridge. You can prepare the rice and chicken ahead of time, then assemble portions as needed. The leftovers stay satisfying without becoming dry or bland, making weekday lunches feel far less stressful when time is short.

    Tips & Tricks

    • Wondering why meal-prep rice sometimes turns mushy? Let the rice cool before mixing it with vegetables and dressing. Warm rice traps steam and softens everything too quickly. If cooking for only 2 people, store extra rice separately so it stays fresh for another lunch later in the week.
    • Frustrated when chicken tastes bland after reheating? Season it a little more than you think you need before cooking because cold foods naturally taste milder. For larger servings, cook the chicken in batches instead of overcrowding the skillet so it browns properly instead of steaming.
    • Concerned about avocado turning brown too quickly? Slice it fresh right before serving whenever possible. If making extra portions for more than 4 people, keep the avocado separate in airtight containers with a squeeze of lemon juice to slow discoloration during storage.
    • Tired of dry lunch bowls after refrigeration? Save a little dressing on the side instead of mixing it all in immediately. This small step helps leftovers stay creamy and fresh. For smaller portions, use only enough dressing for what you plan to eat that day.

    Variations

    Meaty Version

    Looking for an even heartier lunch option? Replace the chicken with sliced turkey, grilled steak strips, or shredded rotisserie chicken for a richer flavor and extra protein. These choices work especially well for larger families because they stretch easily across multiple servings without needing much extra prep time.

    Vegetarian Option

    Trying to make this lunch meat-free without losing fullness? Skip the chicken and add roasted sweet potatoes, black beans, and extra chickpeas instead. The combination keeps the bowl hearty and satisfying while still feeling fresh. For 2 people, use just one type of bean to keep leftovers manageable.

    Ingredient Swap

    Need to work with ingredients already sitting in your fridge? Quinoa, couscous, or farro can replace the brown rice without changing the overall feel of the meal. You can also swap spinach for kale or romaine depending on what stays freshest in your kitchen that week.

    Flavor or Herb Boost

    Want lunch to feel less repetitive during the week? Add chopped basil, dill, cilantro, or a spoonful of pesto to change the flavor without extra cooking. A little crumbled feta or sliced olives also gives the bowls a savory twist that works nicely for casual family lunches.

    Serving Suggestions

    • Warm Grain Bowl Style
      Need a cozy lunch during colder days? Serve the mixture slightly warm with extra roasted vegetables on the side. The warm rice and savory chicken create a comforting meal that still feels balanced. For bigger gatherings, keep the toppings separate so everyone can build their own bowl easily.
    • Fresh Picnic Lunch
      Looking for a lunch that travels well? Pack the ingredients into containers with dressing on the side and add crackers or pita bread for a simple picnic-style meal. Smaller portions work well for light lunches, while larger containers easily feed a group during weekend outings.
    • Family Table Setup
      Want lunch to feel more relaxed at home? Arrange the ingredients in separate bowls so family members can customize their plates. This works especially well for picky eaters because everyone can choose their own toppings while still sharing the same basic meal preparation.
    • Protein-Packed Meal Prep
      Trying to stay organized during hectic weeks? Divide the recipe into four airtight meal-prep containers with avocado packed separately. If feeding more than 4 people, prepare an extra batch of rice and dressing ahead so lunches stay easy for several days in a row.

    Storage Instructions

    • Fridge Storage
      Wondering how long these lunch bowls stay fresh? Store the prepared ingredients in airtight containers in the refrigerator for up to 4 days. Keep the avocado and dressing separate whenever possible to protect texture and color. Smaller portions cool faster, while larger batches should be divided before refrigerating.
    • Reheating
      Concerned about leftovers becoming dry? Reheat the rice and chicken gently in the microwave with a small splash of water to bring back moisture. Add the fresh vegetables and avocado afterward so they stay crisp instead of soft during heating.
    • Freezing
      Need an option for longer storage? Freeze only the cooked rice and chicken mixture because fresh vegetables and yogurt dressing do not thaw well. Portion the frozen mixture into smaller containers for quick lunches or freeze larger family-sized portions for future busy weeks.
    • Make-Ahead Tips
      Trying to save time during the week? Cook the rice and chicken up to two days early and keep chopped vegetables in separate containers until assembly day. This keeps everything fresher and prevents sogginess, especially when making extra servings for meal prep.

    Recipe Timing

    Prep Time: 15 minutes
    Cook Time: 20 minutes
    Rest Time: 5 minutes
    Total Time: 40 minutes

    Nutrition Information (Approximate)

    Trying to keep lunch balanced without overthinking it? Each serving contains around 420–480 calories with approximately 28–35 grams of protein depending on ingredient choices and portion sizes. The recipe also provides fiber from chickpeas and brown rice along with healthy fats from avocado. Nutrition values are estimates and may vary slightly based on ingredients used.

    FAQs

    Can I make this recipe ahead of time?

    Yes. Prepare the rice, chicken, and vegetables ahead, then assemble portions as needed during the week.

    Why does my lunch bowl turn watery?

    Warm rice or vegetables can release moisture. Let cooked ingredients cool before storing them together.

    Can I replace the chicken?

    Absolutely. Turkey, tofu, salmon, or extra beans work well depending on your preference.

    How do I make the bowl thicker and heartier?

    Add extra chickpeas, quinoa, or diced roasted sweet potatoes for a more filling texture.

    How should I store leftovers for 2 people?

    Store smaller portions in separate airtight containers so they stay fresher and reheat evenly.

    How can I boost the flavor?

    Fresh herbs, lemon zest, extra garlic, or a sprinkle of feta cheese can brighten the whole meal quickly.

    Conclusion

    Need a lunch that feels comforting without slowing down your day? Healthy Lunch Recipes That Keep You Full are the kind of meals that make everyday cooking easier while still tasting fresh and satisfying. The simple ingredients, flexible swaps, and easy storage options make this recipe practical for busy schedules, family lunches, or quiet meal-prep afternoons at home. You can easily adjust the portions, switch the flavors, or use whatever vegetables you already have nearby. Once you try it, this bowl becomes one of those reliable lunches you keep coming back to whenever you want something cozy, filling, and stress-free.

    Recipe Card

    Healthy Lunch Recipes That Keep You Full

    Recipe by admin
    Servings

    4

    servings
    Prep time

    15

    minutes
    Cooking time

    20

    minutes
    Calories

    15

    kcal

    This hearty lunch bowl combines brown rice, chicken, fresh vegetables, chickpeas, and creamy dressing for a filling meal that works well for busy weekdays and easy meal prep.

    Ingredients

    • 2 cups cooked brown rice

    • 2 boneless chicken breasts, diced

    • 1 tablespoon olive oil

    • 1 teaspoon garlic powder

    • 1 teaspoon paprika

    • 1 teaspoon salt

    • ½ teaspoon black pepper

    • 1 cup cucumber, chopped

    • 1 cup cherry tomatoes, halved

    • 1 avocado, sliced

    • 1 cup chickpeas, drained

    • 2 cups baby spinach

    • ½ cup plain Greek yogurt

    • 1 tablespoon lemon juice

    • 1 teaspoon honey

    • 1 tablespoon chopped parsley

      For 2 people, use half the ingredients. For more than 4 people, double the ingredients and use a larger skillet.

    Directions

    • Cook the brown rice if not already prepared. Let it cool slightly while seasoning the diced chicken with garlic powder, paprika, salt, and pepper.
    • Heat olive oil in a skillet over medium heat. Cook the chicken until golden and fully cooked, about 8–10 minutes.
    • Add the rice, spinach, cucumber, tomatoes, chickpeas, and cooked chicken into a large bowl.
    • Mix the Greek yogurt, lemon juice, and honey in a small bowl until smooth.
    • Pour the dressing over the lunch mixture and toss gently until combined.
    • Top with avocado slices and chopped parsley before serving.
    • Store leftovers in airtight containers for up to 4 days in the refrigerator.

  • Lunch Ideas That Are Perfect for Work

    Lunch Ideas That Are Perfect for Work

    Introduction

    Wondering what to pack when you are tired of boring desk lunches? Lunch Ideas That Are Perfect for Work can make busy weekdays feel a little easier without adding extra stress to your morning routine. These simple meals are filling, easy to prep ahead, and hold up well in lunch containers for long workdays. I like making recipes like this when the week starts getting hectic because they save both time and money while still tasting homemade. Whether you work from home, head into the office, or need something quick between meetings, these lunches bring comfort, flavor, and practicality together in one easy meal that actually feels satisfying by midday.

    Why You Will Love This Recipe

    Looking for a lunch that stays tasty even after sitting in the fridge overnight? This recipe works beautifully for busy schedules because it is simple, cozy, and flexible enough to fit different tastes. The ingredients are budget-friendly, easy to find, and come together without complicated cooking steps. The flavors stay fresh for several days, making it great for meal prep or packed lunches during long workweeks.

    Need something that does not feel heavy in the middle of the day? These work-friendly lunch bowls are filling without making you sluggish afterward. They also reheat well, which helps on rushed mornings when you just grab a container and go. If you cook for two, the ingredients are easy to cut down naturally, while doubling the batch for larger families or weekly prep feels effortless.

    Ingredients

    Need a rice option that stays fluffy after reheating? Long-grain rice or brown rice works best for packed lunches because it keeps a nice texture in the fridge.

    • 2 cups cooked brown rice
    • 2 medium chicken breasts, diced
    • 1 tablespoon olive oil
    • 1 teaspoon garlic powder
    • 1 teaspoon paprika
    • ½ teaspoon black pepper
    • 1 teaspoon salt
    • 1 cup broccoli florets
    • 1 cup sliced carrots
    • 1 red bell pepper, sliced
    • 1 cup cucumber, diced
    • ½ cup corn kernels
    • ¼ cup chopped parsley
    • 3 tablespoons plain yogurt
    • 1 tablespoon lemon juice
    • 1 teaspoon honey
    • 2 tablespoons shredded cheese

    For 2 people, simply use half the ingredients. For meal prep or more than 4 servings, double the rice, vegetables, and chicken while using a slightly larger pan for even cooking.

    Instructions

    Step 1: Preparation

    Trying to avoid rushed weekday cooking? Cook the rice ahead of time and let it cool slightly. Slice the vegetables into bite-sized pieces and season the diced chicken with paprika, garlic powder, salt, and pepper so every bite tastes flavorful and balanced.

    Step 2: Main Cooking Process

    Need a quick cooking method that does not make a mess? Heat olive oil in a large skillet over medium heat. Cook the chicken until lightly golden and no longer pink inside. Add broccoli, carrots, and bell pepper, cooking until slightly tender but still colorful.

    Step 3: Combining Ingredients

    Wondering how to keep lunch bowls fresh instead of soggy? Divide the rice evenly into four containers, then layer the cooked chicken and vegetables on top. Add cucumber, corn, parsley, and shredded cheese after the warm ingredients cool slightly.

    Step 4: Finishing & Final Simmer

    Want the flavors to come together without extra effort? Stir yogurt, lemon juice, and honey in a small bowl until smooth. Spoon the dressing over each lunch bowl right before serving or pack it separately for fresher texture during the workweek.

    Why This Recipe Works for Busy Days

    Need lunches that save time during packed weekdays? These bowls are easy to prepare ahead and stay fresh for several days in the fridge. You can cook everything in one pan while the rice cooks separately, making cleanup easier after busy evenings. The leftovers also travel well for office lunches, road trips, or quick meals between errands. If you meal prep for one or two people, the portions store neatly without wasting ingredients.

    Tips & Tricks

    • Wondering why packed lunches sometimes taste dry the next day? Let the rice and chicken cool slightly before sealing the containers. Trapped steam can create excess moisture that changes the texture overnight. For two servings, use smaller containers so the ingredients stay tightly packed and fresh.
    • Having trouble with vegetables turning too soft after reheating? Keep the vegetables slightly crisp during cooking because they soften more in the microwave later. If making larger batches for weekly meal prep, cook the vegetables in stages instead of overcrowding the skillet.
    • Want your chicken to stay juicy instead of rubbery? Avoid cooking it on very high heat because it dries out quickly. Medium heat gives better color and tenderness. When reducing the recipe for two people, shorten the cooking time slightly since smaller amounts cook faster.
    • Trying to keep flavors interesting through the week? Pack toppings like parsley, cheese, or dressing separately and add them before eating. This small step keeps everything fresher. If serving more than four people, place toppings in bowls so everyone can customize their portions easily.

    Variations

    Meaty Version

    Need something heartier for long workdays? Swap the chicken with sliced beef strips or cooked turkey for a richer lunch option that still reheats nicely. Ground chicken also works well for a softer texture. If cooking for larger families, prepare extra protein separately so everyone can build their own bowl size.

    Vegetarian Option

    Trying to make lunch meat-free without losing flavor? Replace the chicken with roasted chickpeas, tofu cubes, or black beans for a filling vegetarian version. The vegetables and rice still create a cozy, satisfying meal. For two people, one can of beans is usually enough without needing extra ingredients.

    Ingredient Swap

    Missing a few vegetables from the fridge? Use zucchini, spinach, peas, or cauliflower instead of broccoli and carrots. This recipe works well with leftover produce that needs using up before the weekend. When making extra servings, choose vegetables that stay firm after reheating for better meal prep texture.

    Flavor or Herb Boost

    Want a lunch that tastes a little brighter during busy afternoons? Add fresh dill, cilantro, basil, or a sprinkle of chili flakes for extra flavor. A spoonful of hummus or avocado also makes the bowls creamier. If serving a crowd, set out different herbs so everyone can adjust flavors naturally.

    Serving Suggestions

    • With Warm Soup
      Feeling extra hungry during colder workdays? Pair these lunch bowls with a small container of tomato soup or vegetable soup for a cozy midday meal. The warm soup balances the fresh vegetables nicely. For larger groups, serve the bowls buffet-style so everyone can choose their own side combinations.
    • With Soft Bread
      Want something comforting without much extra work? Serve the bowls with warm pita bread, dinner rolls, or garlic toast for a more filling lunch. The bread helps soak up the creamy dressing beautifully. For two servings, one shared bread basket is usually enough alongside the bowls.
    • With Fresh Fruit
      Trying to keep lunch balanced but still simple? Add sliced apples, grapes, or orange wedges on the side for a refreshing contrast to the savory rice and chicken. This combination works especially well for packed office lunches because the fruit travels easily without extra preparation.
    • With Extra Protein
      Need a heavier lunch after long mornings? Top the bowls with a boiled egg, grilled shrimp, or extra chicken for more protein without changing the recipe too much. If feeding more than four people, keep the extra toppings separate so portions stay flexible for different appetites.

    Storage Instructions

    • Fridge Storage
      Wondering how long these lunch bowls stay fresh? Store the prepared bowls in airtight containers in the refrigerator for up to 4 days. Keep the dressing separate if possible to maintain the best texture. Smaller portions cool faster, while larger meal-prep batches should be divided before refrigerating safely.
    • Reheating
      Trying to avoid dry leftovers at work? Reheat the rice and chicken gently in the microwave for about 1 to 2 minutes, stirring halfway through if possible. Add fresh toppings after heating for better texture. Smaller portions warm faster, while larger containers may need extra reheating time.
    • Freezing
      Need a backup lunch for extra busy weeks? Freeze the rice and cooked chicken mixture in freezer-safe containers for up to 2 months. Leave out fresh vegetables and yogurt dressing until serving day. For easier thawing, freeze individual portions instead of one large container.
    • Make-Ahead Tips
      Looking for ways to simplify weekday mornings? Cook the rice and chicken the night before, then assemble the bowls quickly in the morning with fresh vegetables and toppings. If preparing more than four servings, store ingredients separately so everything stays fresher throughout the week.

    Recipe Timing

    Prep Time: 15 minutes
    Cook Time: 20 minutes
    Rest Time: 5 minutes
    Total Time: 40 minutes

    Nutrition Information (Approximate)

    Wondering if this lunch feels balanced without being too heavy? Each serving contains around 420–480 calories and approximately 28–34 grams of protein, depending on portion size and ingredient choices. The vegetables provide fiber and vitamin C, while the rice adds steady energy. Nutrition values are estimates and may vary based on ingredients, toppings, or serving adjustments.

    FAQs

    Can I make these lunch bowls ahead of time?

    Yes, they stay fresh in the fridge for up to 4 days when stored in airtight containers.

    Why did my vegetables turn mushy?

    They were likely overcooked. Keep them slightly crisp since they soften more during reheating.

    Can I use quinoa instead of rice?

    Yes, quinoa works well and reheats nicely for packed lunches.

    How do I keep the bowls from getting watery?

    Let warm ingredients cool slightly before sealing the containers.

    Can I freeze smaller portions separately?

    Yes, individual portions freeze and thaw much more evenly for quick lunches later.

    How can I make the flavor stronger?

    Add extra lemon juice, fresh herbs, chili flakes, or a spoonful of your favorite sauce before serving.

    Conclusion

    Need lunch ideas that actually make weekdays easier? Lunch Ideas That Are Perfect for Work are simple enough for busy schedules while still feeling homemade and comforting. The flexible ingredients make it easy to use what you already have in the kitchen, and the portions can be adjusted naturally for smaller meals or larger meal-prep sessions. These bowls also help cut down on last-minute takeout while giving you something satisfying to look forward to during the day. Whether you enjoy them warm or cold, they bring together fresh flavors, cozy textures, and practical meal prep in a way that fits real everyday life.

    Recipe Card

    Lunch Ideas That Are Perfect for Work

    Recipe by admin
    Servings

    4

    servings
    Prep time

    15

    minutes
    Cooking time

    20

    minutes
    Calories

    420–480

    kcal

    These easy chicken and rice lunch bowls are great for busy weekdays, office lunches, or simple meal prep. They are filling, fresh, and easy to customize with different vegetables and toppings.

    Ingredients

    • 2 cups cooked brown rice

    • 2 medium chicken breasts, diced

    • 1 tablespoon olive oil

    • 1 teaspoon garlic powder

    • 1 teaspoon paprika

    • ½ teaspoon black pepper

    • 1 teaspoon salt

    • 1 cup broccoli florets

    • 1 cup sliced carrots

    • 1 red bell pepper, sliced

    • 1 cup cucumber, diced

    • ½ cup corn kernels

    • ¼ cup chopped parsley

    • 3 tablespoons plain yogurt

    • 1 tablespoon lemon juice

    • 1 teaspoon honey

    • 2 tablespoons shredded cheese

      For 2 people, use half the ingredients. For more than 4 servings, double the ingredients and cook in a larger skillet.

    Directions

    • Cook the rice if not already prepared. Slice the vegetables and season the chicken with garlic powder, paprika, salt, and pepper.
    • Heat olive oil in a large skillet over medium heat. Cook the chicken until golden and fully cooked.
    • Add broccoli, carrots, and bell pepper to the skillet. Cook until slightly tender but still colorful.
    • Add broccoli, carrots, and bell pepper to the skillet. Cook until slightly tender but still colorful.
    • Add cucumber, corn, parsley, and shredded cheese after the warm ingredients cool slightly.
    • Mix yogurt, lemon juice, and honey in a small bowl. Drizzle over the bowls before serving or pack separately for meal prep.
    • Store in the fridge for up to 4 days. Reheat gently before serving if desired.

  • Healthy Snacks You Can Eat Without Guilt

    Healthy Snacks You Can Eat Without Guilt

    Introduction

    Ever feel hungry between meals but don’t want to ruin your healthy routine? That’s exactly where these Healthy Snacks You Can Eat Without Guilt come in. They’re simple, homemade bites that feel satisfying without being heavy or complicated. I like to keep a batch ready for those busy afternoons or late-night cravings when cooking a full meal feels like too much. These snacks are fresh, lightly sweet or savory, and easy to adjust depending on what you have at home. Whether you’re working, relaxing, or feeding the family, they fit right into everyday life without stress.

    Why You Will Love This Recipe

    Tired of snacks that leave you feeling too full or still hungry? These little bites strike that perfect balance—they’re filling enough to hold you over but light enough that you won’t feel weighed down. What makes them special is how flexible they are; you can mix and match ingredients based on your taste or what’s in your kitchen. They’re cozy, weeknight-friendly, and ideal for prepping ahead so you always have something ready.

    These Healthy Snacks You Can Eat Without Guilt are also budget-friendly and easy to store, making them perfect for families or anyone trying to eat smarter without extra effort. You can make a small batch for two or double it for a crowd without changing the process much.

    Ingredients

    Tip: Use ripe bananas for natural sweetness and softer texture.

    • 2 ripe bananas (for 4 people)
    • 1 cup rolled oats
    • 2 tablespoons honey
    • 2 tablespoons peanut butter
    • 1/4 cup chopped nuts (almonds or walnuts)
    • 2 tablespoons dark chocolate chips (optional)
    • 1/2 teaspoon cinnamon

    For 2 people: simply halve all ingredients. For more than 4, double or triple everything evenly.

    Instructions

    Step 1: Preparation –
    Struggling with messy prep or too many tools? Mash the bananas in a medium bowl until smooth and creamy. Add oats, honey, peanut butter, and cinnamon. Stir gently until everything blends into a soft, slightly sticky mixture with no dry oats visible.

    Step 2: Main Cooking Process –
    Not sure how to get the right texture? Fold in the chopped nuts and chocolate chips, mixing slowly so everything spreads evenly. The mixture should feel thick but scoopable. If it’s too dry, add a teaspoon of milk; if too wet, sprinkle extra oats.

    Step 3: Combining Ingredients –
    Wondering how to shape them neatly? Scoop small portions using a spoon and roll them into bite-sized balls with your hands. Place them on a lined tray, leaving space between each piece so they don’t stick together.

    Step 4: Finishing & Final Simmer –
    Unsure about setting or chilling time? Refrigerate the snack balls for at least 20–30 minutes until firm. For 2 people, chilling time stays the same; for larger batches, give them a little extra space in the fridge to set evenly.

    Why This Recipe Works for Busy Days

    Need something quick that you can grab anytime? These snacks are perfect for make-ahead prep and stay fresh for days. You can prepare them once and enjoy throughout the week without extra cooking. They’re easy to pack, simple to store, and great when you need a quick energy boost.

    Tips & Tricks

    • Finding the right texture can be tricky sometimes, right? If your mixture feels too sticky, lightly wet your hands before shaping. Many people add too much honey, which makes the snacks too soft—balance it with oats. For smaller batches, go easy on wet ingredients to keep consistency right.
    • Ever notice snacks turning dry after chilling? That usually happens when there isn’t enough natural moisture. Use ripe bananas and don’t skip peanut butter. If doubling the recipe, mix in stages so everything blends evenly instead of drying out.
    • Worried about uneven flavor in each bite? Mix ingredients slowly and scrape the bowl edges. A common mistake is rushing this step. For fewer servings, mix by hand carefully; for larger batches, divide into portions before adding extras like nuts or chips.
    • Struggling with storage sticking issues? Place parchment paper between layers when storing. Many people stack them too soon while still soft. For bigger batches, store in multiple containers so they keep shape and don’t press into each other.

    Variations

    • Meaty version
      Want something more filling for longer hunger gaps? Add small bits of cooked, finely shredded chicken with a pinch of salt and herbs for a savory twist. It may sound unusual, but it works well. For smaller servings, use just a little; for larger batches, balance flavors carefully.
    • Vegetarian option
      Looking for a plant-based snack that still feels rich? Replace honey with maple syrup and ensure your chocolate chips are dairy-free. Add seeds like chia or flax for extra texture. Adjust quantities easily by scaling ingredients evenly for smaller or bigger portions.
    • Ingredient swap
      Missing one or two ingredients at home? Swap peanut butter with almond butter or sunflower seed butter. You can also replace oats with crushed whole-grain cereal. Keep the ratios similar so texture stays balanced whether you’re making less or more.
    • Flavor or herb boost
      Want to change the taste without extra effort? Add a pinch of nutmeg, vanilla extract, or even a little orange zest. These small touches can completely refresh the flavor. When increasing batch size, go light on strong flavors so they don’t overpower.

    Serving Suggestions

    • With Fresh Fruit
      Looking for a refreshing combo? Serve these snack bites alongside sliced apples or berries. The freshness balances the richness. For smaller servings, just a handful of fruit works, while larger gatherings can include a full fruit platter.
    • With Yogurt Dip
      Want something creamy on the side? Pair with a small bowl of plain or lightly sweetened yogurt. It adds a cool contrast. Adjust portion sizes by serving individual cups for small groups or a larger shared bowl for family servings.
    • As Lunchbox Treats
      Packing snacks for the day? These fit perfectly in lunchboxes without mess. Add a few pieces depending on portion size. For kids or smaller appetites, 2–3 pieces are enough; for adults, pack a few extra.
    • With Warm Drinks
      Craving a cozy pairing? Enjoy these with tea or coffee in the evening. The soft texture and light sweetness complement warm drinks well. Scale serving amounts based on how many people you’re hosting.

    Storage Instructions

    • Fridge Storage
      Not sure how long they stay fresh? Store in an airtight container in the fridge for up to 5 days. Keep layers separated with paper. For smaller batches, a single container works fine; for larger ones, divide into portions to maintain freshness.
    • Reheating
      Want them slightly warm again? These are best eaten cold, but you can leave them at room temperature for a few minutes. Avoid microwaving, as it can make them too soft, especially if you’ve made a bigger batch.
    • Freezing
      Thinking of saving some for later? Freeze in a single layer first, then transfer to a bag. They last up to 2 months. For small portions, freeze only what you need; for large batches, label portions for easy use.
    • Make-Ahead Tips
      Trying to plan snacks for the week? Prepare a batch ahead and store properly. The texture actually improves after chilling. If making for more people, shape and store in separate portions so they’re easy to grab anytime.

    Recipe Timing

    Prep Time: 10 minutes
    Cook Time: 0 minutes
    Rest Time: 30 minutes
    Total Time: 40 minutes

    Nutrition Information (Approximate)

    Watching your intake but still want something tasty? Each serving contains around 120–150 calories, with 3–5g protein. These snacks also provide fiber from oats and healthy fats from nuts. Values may vary depending on ingredients and portion sizes.

    FAQs

    Can I make these ahead of time?
    Yes, they store well in the fridge for several days, making them perfect for planning ahead.

    Why are my snacks too soft?
    Too much banana or honey can cause this—add extra oats to fix it.

    Can I replace peanut butter?
    Yes, use almond or seed butter in the same amount.

    Why are they not holding shape?
    The mixture may be too wet; chill longer or add oats.

    How should I store leftovers?
    Keep them in an airtight container in the fridge or freezer.

    Can I adjust sweetness?
    Yes, reduce honey or skip chocolate chips for a lighter taste.

    Conclusion

    Looking for simple ways to snack smarter without overthinking it? These Healthy Snacks You Can Eat Without Guilt are a great place to start. They’re easy to make, flexible with ingredients, and perfect for everyday life. You can tweak flavors, adjust portions, and keep them ready whenever hunger strikes. Whether you’re making a small batch for yourself or a bigger one for family, they fit right in without any fuss. Once you try them, you’ll likely keep coming back to this simple, cozy snack idea again and again.

    Recipe Card

    Healthy Snacks You Can Eat Without Guilt

    Recipe by admin
    Servings

    4

    servings
    Prep time

    10

    minutes
    Cooking timeminutes
    Calories

    120–150

    kcal

    Simple, no-bake snack bites made with bananas, oats, and nuts. Light, tasty, and easy to prepare for everyday snacking. Perfect for quick hunger cravings.

    Ingredients

    • 2 ripe bananas

    • 1 cup rolled oats

    • 2 tablespoons honey

    • 2 tablespoons peanut butter

    • 1/4 cup chopped nuts

    • 2 tablespoons chocolate chips (optional)

    • 1/2 teaspoon cinnamon

      For 2 people: use half of each ingredient. For more than 4: double or triple evenly.

    Directions

    • Mash bananas in a bowl until smooth.
    • Add oats, honey, peanut butter, and cinnamon. Mix well.
    • Stir in nuts and chocolate chips evenly.
    • Scoop small portions and roll into balls.
    • Place on a tray and chill for 20–30 minutes until firm.

      These easy snack bites are ready to enjoy anytime.


  • Snack Ideas That Are Quick and Delicious

    Snack Ideas That Are Quick and Delicious

    Introduction

    Ever feel stuck wondering what to eat when you’re hungry but short on time? Snack Ideas That Are Quick and Delicious are exactly what you need for those busy afternoons, late-night cravings, or quick bites between meals. These simple snacks come together fast, use everyday ingredients, and still feel satisfying and cozy. I often put these together when the kitchen feels like too much effort but I still want something homemade. Whether you’re feeding family or just yourself, these snack ideas are flexible, comforting, and easy to adjust for any day of the week.

    Why You Will Love This Recipe

    Looking for snacks that don’t take much effort but still taste amazing? These quick bites are perfect for real life—easy to make, easy to clean up, and easy to enjoy. You can mix and match ingredients depending on what’s in your kitchen, which keeps things budget-friendly and stress-free. Snack Ideas That Are Quick and Delicious are great for busy weeknights, casual gatherings, or even meal prep. They store well, reheat nicely, and can be scaled up when you have guests or reduced for a quiet night in. Everything feels simple, cozy, and totally doable without any pressure.

    Ingredients

    Wondering which ingredients make the biggest difference in quick snacks? Always choose fresh bread or base items for the best texture and taste.

    • 8 slices bread (for 4 people; use 4 slices for 2 people, or double for more)
    • 2 cups boiled chicken (shredded)
    • 1 cup grated cheese
    • 1/2 cup chopped vegetables (capsicum, onion, corn)
    • 2 tbsp mayonnaise
    • 1 tbsp ketchup
    • 1 tsp black pepper
    • 1/2 tsp salt
    • 2 tbsp butter

    Instructions

    Step 1: Preparation –

    Not sure how to start without making a mess? Begin by shredding the boiled chicken and chopping vegetables into small pieces. Lay out the bread slices and keep all ingredients within reach so the process feels smooth and quick from the start.

    Step 2: Main Cooking Process –

    Worried about getting the filling just right? In a bowl, mix chicken, vegetables, mayonnaise, ketchup, salt, and pepper until creamy. Heat a pan on medium and lightly butter one side of each bread slice for a golden, crisp finish.

    Step 3: Combining Ingredients –

    Unsure how much filling to use without overstuffing? Spread the mixture evenly on four bread slices, sprinkle cheese on top, then cover with remaining slices. Press gently so everything stays in place while cooking and melts evenly inside.

    Step 4: Finishing & Final Simmer –

    Wondering when it’s perfectly done? Place sandwiches on the pan and cook until both sides turn golden brown and crispy, and cheese melts inside. For 2 people, cook fewer pieces; for more, use a larger pan or cook in batches.

    Why This Recipe Works for Busy Days

    Need something quick that still feels homemade? These snacks come together in minutes and don’t require complicated steps. You can prep the filling ahead of time and store it in the fridge, making last-minute cooking even faster. They’re perfect for saving and trying later when time is tight.

    Tips & Tricks

    • Want extra crispy texture without burning? Cook on medium heat instead of high so the bread crisps slowly while the filling warms through. If making for 2 people, use less butter to avoid sogginess. For larger batches, wipe the pan between rounds to keep it clean.
    • Struggling with soggy sandwiches? Avoid adding too much sauce in the filling. Keep it creamy but not wet. For smaller portions, reduce sauces slightly. When making more than 4 servings, mix in batches instead of one large bowl to maintain the right texture.
    • Not sure how to melt cheese evenly? Cover the pan briefly with a lid to trap heat and help the cheese melt faster. For fewer servings, this step takes less time. For bigger portions, keep cooked sandwiches warm in a low-heat oven.
    • Want better flavor without extra work? Lightly toast bread before adding filling for a deeper taste. If cooking for 2, this step adds crunch without extra ingredients. For larger groups, toast all bread slices first to save time during assembly.

    Variations

    • Meaty Version
      Want something more filling? Add cooked minced beef or leftover shredded meat instead of chicken. It gives a richer flavor and makes the snack more hearty. Adjust the quantity based on servings—half for 2 people or double for larger groups.
    • Vegetarian Option
      Trying to skip meat but keep it satisfying? Replace chicken with mashed potatoes or paneer mixed with vegetables. It stays creamy and delicious while being lighter. For smaller servings, reduce spices slightly; for bigger batches, add extra cheese for balance.
    • Ingredient Swap
      Missing one or two ingredients at home? Swap mayonnaise with yogurt or cream for a lighter taste. You can also use brown bread instead of white. Adjust amounts gently depending on how many people you’re serving so flavors stay balanced.
    • Flavor Boost
      Want to make it more exciting without extra effort? Add chili flakes, garlic powder, or fresh herbs like coriander. These small touches make a big difference. For 2 people, use a pinch; for more servings, increase slowly to avoid overpowering the snack.

    Serving Suggestions

    • With a Fresh Salad
      Looking for a balanced plate? Serve these snacks with a simple cucumber or lettuce salad. It adds freshness and crunch. For 2 people, keep portions light. For bigger groups, prepare a large salad bowl to complement the warm sandwiches.
    • With Dips on the Side
      Want to make snack time more fun? Pair with ketchup, garlic mayo, or a light yogurt dip. This works well for gatherings. Adjust dip quantities depending on servings so everyone gets enough without waste.
    • As a Tea-Time Treat
      Planning a cozy evening snack? These sandwiches go perfectly with tea. Cut them into smaller pieces for easy sharing. For fewer people, serve whole pieces; for larger groups, slice into halves or quarters for better presentation.
    • For Kids’ Lunch Boxes
      Need something quick for school meals? Pack these as a warm lunch option. Keep portions smaller for kids and avoid too much spice. For multiple lunch boxes, prepare everything together and cook in batches to save time.

    Storage Instructions

    • Fridge Storage
      Worried about leftovers going bad? Store cooked snacks in an airtight container in the fridge for up to 2 days. For smaller portions, use compact containers. For larger batches, layer with paper to prevent sticking and sogginess.
    • Reheating
      Not sure how to bring back the crispiness? Reheat on a pan instead of a microwave for best results. For 2 servings, a few minutes is enough. For larger amounts, reheat in batches to keep texture fresh.
    • Freezing
      Thinking about saving for later? Freeze uncooked assembled sandwiches wrapped tightly. Use within 2 weeks. For smaller servings, freeze individually. For larger batches, label portions so you can thaw only what you need.
    • Make-Ahead Tips
      Want to save time during busy days? Prepare the filling in advance and store it in the fridge. Assemble fresh when needed. For 2 people, make a small batch; for more, double the filling and use it across multiple meals.

    Recipe Timing

    Prep Time: 10 minutes
    Cook Time: 10 minutes
    Rest Time: Not needed
    Total Time: 20 minutes

    Nutrition Information (Approximate)

    Curious about what you’re eating? Each serving contains around 250–320 calories, with 12–18g protein depending on ingredients used. It also provides calcium from cheese and some fiber from vegetables. Values are estimates and may vary based on portion size and ingredient choices.

    FAQs

    Can I make this ahead of time?
    Yes, prepare the filling earlier and store it in the fridge. Assemble fresh when needed.

    What is a common mistake to avoid?
    Adding too much sauce can make the bread soggy. Keep the mixture balanced.

    Can I substitute chicken?
    Yes, use vegetables, paneer, or even beans as an alternative.

    Why is my sandwich not crispy?
    Cooking on high heat can burn outside but leave inside soft. Use medium heat.

    How should I store leftovers?
    Keep in an airtight container in the fridge and reheat on a pan.

    How can I adjust flavors?
    Add spices slowly. For smaller servings, use less; for larger batches, increase gradually.

    Conclusion

    Still looking for something simple yet satisfying to make today? Snack Ideas That Are Quick and Delicious are perfect for everyday life when you want something warm, easy, and comforting without spending too much time in the kitchen. You can switch ingredients, adjust portions, and make them your own depending on what you have at home. These snacks are easy to come back to again and again, whether it’s for a quick bite or sharing with family. Keep this idea saved—you’ll be glad to have it on those busy days.

    Recipe Card

    Snack Ideas That Are Quick and Delicious

    Recipe by admin
    Servings

    4

    servings
    Prep time

    10

    minutes
    Cooking time

    10

    minutes
    Calories

    250–320

    kcal

    Ingredients

    • 8 bread slices (use 4 for 2 people, double for more)

    • 2 cups boiled shredded chicken

    • 1 cup grated cheese

    • 1/2 cup chopped vegetables

    • 2 tbsp mayonnaise

    • 1 tbsp ketchup

    • 1 tsp black pepper

    • 1/2 tsp salt

    • 2 tbsp butter

    Directions

    • Shred chicken and chop vegetables. Keep everything ready.
    • Mix chicken, vegetables, mayonnaise, ketchup, salt, and pepper in a bowl.
    • Spread mixture on bread slices, add cheese, and cover with another slice.
    • Heat pan, add butter, and cook sandwiches until golden and crispy on both sides.

      Adjust quantities easily: use half ingredients for 2 people or double for more servings.

  • Easy Desserts Anyone Can Make (No Skills Needed!)

    Easy Desserts Anyone Can Make (No Skills Needed!)

    Introduction

    Ever feel like dessert is too complicated after a long day? Easy Desserts Anyone Can Make (No Skills Needed!) are exactly what you reach for when time is short but your sweet tooth isn’t. These simple treats skip fancy tools and tricky steps, using everyday ingredients you likely already have at home. I often put this together when I want something warm, soft, and comforting without thinking too much. Whether it’s a quick family treat, a cozy evening snack, or something to share with guests, this kind of dessert brings ease and joy to your kitchen without stress.

    Why You Will Love This Recipe

    Looking for something sweet that doesn’t drain your energy? This recipe keeps things simple, affordable, and truly satisfying. Easy Desserts Anyone Can Make (No Skills Needed!) are soft, lightly sweet, and flexible enough to adjust with what you have on hand. You don’t need baking skills or special equipment—just mix, cook, and enjoy. It’s perfect for weeknights, beginner cooks, or even kids helping in the kitchen. Plus, it stores well, so leftovers won’t go to waste. The cozy texture and warm flavor make it feel like a small reward after a busy day, without any extra effort.

    Ingredients

    Want the best flavor with basic ingredients? Use fresh milk and soft bread for the most comforting texture.

    • 8 slices white bread (for 4 people; use 4 slices for 2 people or double for more)
    • 2 cups milk
    • 4 tablespoons sugar
    • 1 teaspoon vanilla extract
    • 2 tablespoons butter
    • 1 teaspoon cinnamon (optional)
    • 2 tablespoons chopped nuts (optional)

    Instructions

    Step 1: Preparation

    Not sure where to start without making a mess? Begin by cutting the bread slices into small cubes and setting them aside. Warm the milk gently in a pan until it feels hot but not boiling. For 2 people, simply halve all ingredients and use a smaller pan.

    Step 2: Main Cooking Process

    Worried about burning the mixture? Melt the butter in a pan over low heat, then add the bread cubes and lightly toast them until they turn slightly golden and smell warm and nutty. Keep stirring gently so nothing sticks or burns.

    Step 3: Combining Ingredients

    Unsure when to mix everything together? Slowly pour the warm milk into the toasted bread while stirring. Add sugar and vanilla, mixing until the bread softens and starts to absorb the liquid, forming a thick, pudding-like texture.

    Step 4: Finishing & Final Simmer

    Wondering how to get the perfect soft texture? Let the mixture simmer on low heat for a few minutes until it thickens slightly. Sprinkle cinnamon and nuts on top if using. For larger servings, extend cooking time slightly while stirring to keep the texture smooth.

    Why This Recipe Works for Busy Days

    Need something quick you can save for later? This dessert comes together in under 20 minutes and uses simple pantry items. It’s easy to reheat and tastes just as good the next day. You can even prepare it ahead and warm it when needed, making it perfect for busy routines.

    Tips & Tricks

    • Trying to avoid soggy texture? Toast the bread just enough to firm it up before adding milk. Skipping this step can make it too mushy. If making for 2 people, reduce milk slightly to keep the balance right, and for larger batches, toast in portions.
    • Want a richer taste without extra work? Use slightly creamy milk instead of very thin milk. It adds depth without changing the process. For smaller portions, keep the same ratio but scale gently to avoid overpowering sweetness.
    • Struggling with uneven sweetness? Always dissolve sugar fully in warm milk before it thickens. This prevents grainy texture. If doubling the recipe, add sugar gradually and taste as you go to keep it balanced.
    • Looking for better texture control? Stir frequently during the final simmer to avoid lumps. For smaller servings, reduce cooking time slightly. For bigger portions, cook a bit longer but keep heat low for even consistency.

    Variations

    • Meaty version
      Want to turn this into a rich treat? Add small bits of cooked shredded chicken with a hint of sweetness for a unique sweet-savory twist. It works surprisingly well. Adjust quantities easily by reducing or increasing both bread and milk depending on serving size.
    • Vegetarian option
      Need a fully plant-based version? Replace milk with almond or coconut milk and use plant-based butter. The result is just as creamy and comforting. For 2 servings, keep proportions smaller but consistent for the same texture.
    • Ingredient swap
      Missing bread at home? Try using leftover cake pieces or plain biscuits instead. They absorb milk differently, so reduce liquid slightly. When cooking for more people, increase gradually and check texture as you go.
    • Flavor or herb boost
      Want to make it more aromatic? Add cardamom powder or a drop of rose water for a deeper flavor. These small changes make it feel special. For larger batches, add spices slowly to avoid overpowering the dish.

    Serving Suggestions

    • Warm bowl comfort
      Looking for a cozy serving idea? Serve it warm in small bowls with a sprinkle of nuts. It’s perfect for family evenings. For fewer people, serve smaller portions, and for gatherings, use a large serving dish to share easily.
    • With fresh fruit
      Want something refreshing on the side? Pair it with sliced bananas or apples. The contrast adds balance. Adjust portions naturally by increasing fruit along with the dessert for bigger groups.
    • Dessert platter style
      Planning to impress guests simply? Serve alongside cookies or small pastries for variety. This works well for larger servings without extra cooking effort.
    • Chilled version
      Prefer something cool instead of warm? Let it cool and refrigerate before serving. It becomes slightly firmer and refreshing. Perfect for hot days and easy to portion for any group size.

    Storage Instructions

    • Fridge storage
      Worried about leftovers going bad? Store in an airtight container in the fridge for up to 2 days. For smaller portions, use compact containers to keep freshness intact.
    • Reheating
      Not sure how to reheat without drying it out? Warm it gently on the stove with a splash of milk to bring back softness. For single servings, reheat in small batches.
    • Freezing
      Thinking about saving it longer? Freeze in portion-sized containers for up to a month. Thaw overnight in the fridge before reheating for best texture.
    • Make-ahead tips
      Want to prep in advance? You can prepare it a few hours earlier and reheat before serving. Adjust liquid slightly when reheating to keep it soft and creamy.

    Recipe Timing

    Prep Time: 5 minutes
    Cook Time: 15 minutes
    Rest Time: Not needed
    Total Time: 20 minutes

    Nutrition Information (Approximate)

    Curious about what you’re eating? Each serving contains around 180–250 calories, with 4–6g protein. It also provides calcium from milk and small amounts of healthy fats. Values are estimates and may vary depending on ingredients and portion sizes.

    FAQs

    Can I make this ahead of time?
    Yes, prepare it a few hours earlier and reheat gently before serving.

    What is a common mistake?
    Skipping the bread toasting step can make it too soft and mushy.

    Can I substitute milk?
    Yes, use almond or coconut milk for a different flavor.

    Why is my dessert too thick?
    Add a little warm milk and stir to loosen the texture.

    How should I store leftovers?
    Keep in the fridge in a sealed container for up to 2 days.

    How can I adjust flavor?
    Add cinnamon, cardamom, or vanilla to enhance the taste easily.

    Conclusion

    Looking for a simple dessert you’ll actually make again? Easy Desserts Anyone Can Make (No Skills Needed!) bring comfort without effort. You can change flavors, adjust portions, and use what you already have at home. It’s the kind of recipe that fits into real life—quick, warm, and satisfying. Once you try it, you’ll find yourself coming back to it on busy days or quiet evenings. Keep it simple, make it your own, and enjoy every soft, sweet bite.

    Recipe Card

    Easy Desserts Anyone Can Make (No Skills Needed!)

    Recipe by admin
    Servings

    4

    servings
    Prep time

    5

    minutes
    Cooking time

    15

    minutes
    Calories

    200

    kcal

    Ingredients

    • 8 slices white bread (use 4 for 2 people or double for more)

    • 2 cups milk

    • 4 tablespoons sugar

    • 1 teaspoon vanilla extract

    • 2 tablespoons butter

    • 1 teaspoon cinnamon (optional)

    • 2 tablespoons chopped nuts (optional)

    Directions

    • Cut bread into small cubes and warm the milk gently.
    • Melt butter in a pan and lightly toast the bread cubes until golden.
    • Pour warm milk into the pan, add sugar and vanilla, and stir well.
    • Cook on low heat until thick and soft, then add cinnamon and nuts if desired.

      Enjoy warm or chilled, and adjust quantities easily for smaller or larger servings.
  • Dessert Recipes That Will Blow Your Mind

    Dessert Recipes That Will Blow Your Mind

    Introduction

    Ever find yourself craving something sweet but not wanting a complicated kitchen mess? These Dessert Recipes That Will Blow Your Mind are the kind you turn to when you want comfort without stress. They’re rich, cozy, and surprisingly simple to pull together, even on a busy evening. I often make this when I need a quick dessert that still feels special enough for family nights or small gatherings. The flavors are warm, the texture is dreamy, and it’s the kind of treat people remember. Whether it’s a quiet night in or a casual get-together, this dessert fits right in.

    Why You Will Love This Recipe

    Looking for a dessert that feels homemade but doesn’t take hours? This recipe brings that perfect balance of ease and indulgence, making it ideal for weeknights or last-minute plans. The texture is soft and comforting, while the flavors feel rich without being overwhelming. It’s budget-friendly and uses simple ingredients you likely already have at home.

    Want something that works for different occasions? These Dessert Recipes That Will Blow Your Mind are flexible enough for cozy nights, family dinners, or even make-ahead treats for later. You can store leftovers easily, and they reheat beautifully. It’s one of those recipes you’ll save, come back to, and quietly rely on again and again.

    Ingredients

    Tip: Use good-quality dark chocolate for deeper flavor and smoother texture.

    • 200g dark chocolate
    • 100g butter
    • 3/4 cup sugar
    • 2 eggs
    • 1 teaspoon vanilla extract
    • 1/2 cup all-purpose flour
    • 1/4 teaspoon salt
    • 1/2 cup milk

    (For 2 people: simply halve all ingredients. For more than 4, double quantities carefully and use a slightly larger baking dish.)

    Instructions

    Step 1: Preparation –
    Struggling with desserts sticking or turning uneven? Start by preheating your oven to 180°C and greasing a small baking dish. Chop the chocolate into small pieces so it melts smoothly. If cooking for two, use a smaller pan for even baking.

    Step 2: Main Cooking Process –
    Worried about burning chocolate? Melt the butter and chocolate together gently using low heat or a microwave in short bursts. Stir until glossy and smooth. For larger servings, melt in batches so everything blends evenly without overheating.

    Step 3: Combining Ingredients –
    Not sure how to avoid lumps in batter? Whisk sugar, eggs, and vanilla until slightly fluffy, then slowly mix in the melted chocolate. Fold in flour, salt, and milk gently. Smaller portions mix faster, while bigger batches need a bit more folding.

    Step 4: Finishing & Final Simmer –
    Concerned about overbaking? Pour the batter into your dish and bake for 20–25 minutes until the center is slightly soft. For two servings, check earlier. For larger batches, add a few extra minutes but keep the center soft and moist.

    Why This Recipe Works for Busy Days

    Need something quick but still homemade? This dessert comes together with simple steps and minimal cleanup, making it ideal for busy schedules. You can prep the batter ahead and bake later, or store leftovers for the next day. It’s the kind of recipe you save for when time is short but cravings are real.

    Tips & Tricks

    • Ever notice desserts turning dry too quickly? Keep an eye on baking time and remove when the center is still slightly soft. For smaller portions, check earlier. For bigger batches, rotate the dish halfway to ensure even baking and prevent edges from overcooking.
    • Finding your chocolate turning grainy? Always melt it slowly and avoid high heat. If making a larger portion, melt in smaller batches instead of all at once. For two servings, a quick microwave melt works perfectly without overdoing it.
    • Wondering why texture feels too dense? Don’t overmix the batter after adding flour. Stir just until combined. When doubling the recipe, mix in stages rather than all at once to keep the batter light and soft.
    • Struggling with sticking issues? Always grease your dish well or use parchment paper. For smaller servings, use a compact dish to maintain thickness. For larger groups, spread evenly so baking remains consistent across the pan.

    Variations

    Meaty Version
    Thinking of adding a surprising twist? You can pair this dessert with crispy bacon bits for a sweet-salty combo that works surprisingly well. Keep the base recipe the same and sprinkle lightly on top. Adjust toppings depending on serving size so flavors stay balanced.

    Vegetarian Option
    Need a fully vegetarian-friendly version? This recipe already fits perfectly, but you can enhance it with plant-based butter and dairy-free milk. The texture stays soft and rich. Whether cooking for two or more, simply adjust quantities while keeping ratios consistent.

    Ingredient Swap
    Missing an ingredient at home? Swap dark chocolate with milk chocolate for a sweeter taste, or use whole wheat flour for a slightly nutty flavor. For smaller portions, changes are easier to control, while larger batches may need slight sweetness adjustments.

    Flavor Boost
    Want to elevate the flavor easily? Add a pinch of cinnamon or a handful of chopped nuts for extra texture. For bigger servings, increase add-ins gradually so they don’t overpower the base. Smaller portions need just a light touch for balance.

    Serving Suggestions

    • Warm & Cozy Style
      Looking for a comforting way to serve this? Enjoy it warm straight from the oven with a scoop of ice cream. For two people, serve in smaller bowls. For larger groups, cut into squares so everyone gets a soft, rich portion.
    • Family Dessert Plate
      Need something easy for family dinners? Serve slices with fresh fruit on the side for balance. Adjust portion sizes based on the number of people, keeping pieces slightly smaller if serving alongside other dishes.
    • Casual Gathering Treat
      Hosting a small get-together? Cut into bite-sized squares and arrange on a simple platter. For bigger groups, double the recipe and use a larger tray so everyone gets a piece without rushing.
    • Late-Night Sweet Fix
      Craving something simple at night? Reheat a small portion and enjoy with a warm drink. For smaller servings, store in individual portions. For larger batches, slice ahead for quick access later.

    Storage Instructions

    • Fridge Storage
      Worried about leftovers going dry? Store in an airtight container in the fridge for up to 3 days. For smaller portions, wrap individually. Larger batches should be layered with parchment paper to keep pieces from sticking together.
    • Reheating
      Not sure how to bring back that soft texture? Warm in the microwave for 10–15 seconds. Smaller pieces heat faster, while bigger slices may need a few extra seconds. Avoid overheating to keep the center moist.
    • Freezing
      Planning to save for later? Freeze in airtight containers for up to 2 months. Slice into portions before freezing so you can thaw only what you need, whether it’s for two people or a larger group.
    • Make-Ahead Tips
      Want to prepare in advance? Mix the batter and store it in the fridge for up to 24 hours before baking. For smaller servings, keep in a small container. For larger batches, stir gently before baking to keep texture smooth.

    Recipe Timing

    Prep Time: 10 minutes
    Cook Time: 25 minutes
    Rest Time: 5 minutes
    Total Time: 40 minutes

    Nutrition Information (Approximate)

    Concerned about calories? Each serving contains around 250–320 calories, depending on ingredients used. Protein ranges between 4–6g per serving. It also provides small amounts of iron and calcium. Values are estimates and may vary based on portion size and ingredient choices.

    FAQs

    Can I make this ahead of time?
    Yes, you can prepare the batter a day before and bake when needed. Adjust quantity based on servings.

    Why is my dessert too dry?
    It may be overbaked. Reduce baking time slightly, especially for smaller portions.

    Can I replace chocolate?
    Yes, milk chocolate works for a sweeter taste. Adjust sugar slightly if needed.

    Why is the texture too thick?
    Too much flour or overmixing can cause this. Measure carefully and mix gently.

    How do I store leftovers?
    Keep in the fridge in an airtight container for up to 3 days. Slice based on portion needs.

    Can I adjust the sweetness?
    Yes, reduce sugar slightly or use darker chocolate for less sweetness.

    Conclusion

    Looking for a dessert that feels special without being complicated? These Dessert Recipes That Will Blow Your Mind bring together simple ingredients and cozy flavors in a way that just works. You can tweak it, scale it, and make it your own depending on the moment. It’s the kind of recipe you’ll come back to when you want something sweet but comforting. Whether you’re baking for yourself or sharing with others, it fits naturally into everyday life. Save it, try it, and enjoy the little joy it brings to your table.

    Recipe Card

    Dessert Recipes That Will Blow Your Mind

    Recipe by admin
    Servings

    4

    servings
    Prep time

    10

    minutes
    Cooking time

    25

    minutes
    Calories

    250–320

    kcal

    A rich, soft chocolate dessert that’s easy to make and perfect for cozy evenings. Simple ingredients, quick steps, and a comforting texture everyone will enjoy.

    Ingredients

    • 200g dark chocolate

    • 100g butter

    • 3/4 cup sugar

    • 2 eggs

    • 1 teaspoon vanilla extract

    • 1/2 cup all-purpose flour

    • 1/4 teaspoon salt

    • 1/2 cup milk

      (For 2 people: use half of each ingredient. For more than 4: double ingredients and use a larger pan.)

    Directions

    • Preheat oven to 180°C and grease a baking dish. Chop chocolate into small pieces.
    • Melt butter and chocolate together slowly until smooth.
    • Whisk sugar, eggs, and vanilla, then mix in melted chocolate. Add flour, salt, and milk gently.
    • Pour into dish and bake for 20–25 minutes until the center is slightly soft. Cool briefly and serve.

  • Healthy Breakfast Recipes to Start Your Day Right

    Healthy Breakfast Recipes to Start Your Day Right

    Introduction

    Do you ever wake up feeling unsure what to eat that won’t weigh you down? Healthy Breakfast Recipes to Start Your Day Right are simple, fresh meals that give you steady energy without feeling heavy. These are the kind of breakfasts you can pull together even on busy mornings, with ingredients you likely already have. I often reach for these when I want something quick but still nourishing. They’re warm, comforting, and easy to adjust for family meals or quiet mornings. Whether you’re rushing out the door or sitting down slowly, these recipes fit into real life without stress.

    Why You Will Love This Recipe

    Do you want a breakfast that feels good and still tastes satisfying? These healthy breakfast ideas bring together flavor and ease in a way that feels natural, not forced. You get simple ingredients, quick prep, and meals that actually keep you full until lunch. They’re cozy enough for slow mornings but practical for weekdays too.

    Do you struggle with meals that feel boring after a few days? These recipes are flexible, so you can swap ingredients based on what you have at home. They’re also budget-friendly and work well for leftovers, making them great for planning ahead.

    Do you need something family-friendly? These breakfasts are easy to scale, making them perfect whether you’re cooking for two or feeding a full table of four.

    Ingredients

    Do you want the best flavor from simple ingredients? Use ripe bananas for natural sweetness and soft texture.

    • 2 ripe bananas (for 4 people; use 1 for 2 people, 3–4 for larger batches)
    • 2 cups oats
    • 2 cups milk (any type)
    • 2 eggs
    • 2 tbsp honey
    • 1 tsp cinnamon
    • 1 tsp vanilla extract
    • 1 tsp baking powder
    • Pinch of salt
    • ½ cup berries (fresh or frozen)
    • 2 tbsp chopped nuts

    Instructions

    Step 1: Preparation –
    Do you feel rushed in the morning and want a quick start? Mash the bananas in a bowl until smooth, then add eggs, milk, honey, and vanilla. Stir gently until everything blends into a creamy, slightly thick mixture with a soft, sweet aroma.

    Step 2: Main Cooking Process –
    Do you worry about getting the texture just right? Add oats, baking powder, cinnamon, and salt into the mixture. Stir slowly until combined. Let it sit for a few minutes so the oats soften slightly and absorb the liquid.

    Step 3: Combining Ingredients –
    Do you want every bite to feel balanced and flavorful? Fold in berries and nuts gently so they spread evenly. Pour the mixture into a greased baking dish, making sure the top looks even and slightly glossy.

    Step 4: Finishing & Final Simmer –
    Do you find it tricky to know when it’s done? Bake at 180°C for about 25–30 minutes until the top turns golden and the center feels set. For 2 people, reduce baking time slightly; for larger batches, extend a few minutes.

    Why This Recipe Works for Busy Days

    Do you often skip breakfast because of time? This recipe can be prepped the night before and baked fresh in the morning or reheated quickly. It stores well and tastes just as good later, making it perfect for meal prep. You can portion it out easily for different family sizes.

    Tips & Tricks

    • Do you sometimes end up with dry baked oats? Make sure your banana is ripe and soft, as it adds moisture naturally. If cooking for just 2 people, slightly reduce oats to keep texture balanced, while larger batches may need a splash more milk.
    • Do you struggle with uneven baking? Spread the mixture evenly in the dish and avoid overfilling. Smaller portions cook faster, so check early for 2 servings, while bigger trays may need extra minutes to cook through the center.
    • Do you want more natural sweetness without sugar? Add extra banana or a few chopped dates instead of honey. When adjusting for more servings, increase sweet ingredients slowly to avoid overpowering the flavor.
    • Do you find your oats too soft or too firm? Letting the mixture rest before baking helps oats absorb liquid properly. For smaller portions, reduce resting time slightly; for larger ones, give it an extra minute or two.

    Variations

    Meaty Version
    Do you prefer a savory breakfast with protein? Add small pieces of cooked chicken or turkey into the mix, along with a pinch of black pepper and herbs. It turns the dish into a hearty meal. For 2 people, keep portions small; for larger servings, increase meat gradually.

    Vegetarian Option
    Do you want to keep it plant-based? Replace eggs with mashed apples or yogurt and use plant milk. Add seeds like chia or flax for texture. The recipe stays soft and filling, and you can easily adjust quantities depending on how many people you’re serving.

    Ingredient Swap
    Do you run out of oats sometimes? You can use crushed whole-grain cereal or a mix of oats and semolina. The texture changes slightly but still works well. For smaller servings, test small batches first before scaling up for a crowd.

    Flavor Boost
    Do you get bored with the same taste? Add cocoa powder, nut butter, or a hint of cardamom for a different flavor. These small changes make the recipe feel new every time, whether you’re cooking for yourself or a larger group.

    Serving Suggestions

    • With Yogurt on Top
      Do you want a creamy contrast? Serve warm slices with a spoon of yogurt and a drizzle of honey. For smaller portions, keep toppings light; for bigger groups, set up a topping station so everyone can customize.
    • Fresh Fruit Side
      Do you enjoy something refreshing with your meal? Pair it with sliced apples, oranges, or extra berries. This works well for both small breakfasts and larger family spreads without much extra effort.
    • Nut Butter Drizzle
      Do you like richer flavors? Add a drizzle of peanut or almond butter on top. Adjust the amount based on serving size so it doesn’t overpower the dish.
    • Warm with Tea or Coffee
      Do you want a cozy morning setup? Serve alongside your favorite hot drink. This simple pairing turns it into a calm, comforting breakfast for any number of people.

    Storage Instructions

    • Fridge Storage
      Do you worry about leftovers going to waste? Store portions in an airtight container in the fridge for up to 3 days. Keep smaller portions separate for easy reheating, while larger batches can be sliced and stored in layers.
    • Reheating
      Do you find reheated food gets dry? Warm slices in the microwave with a splash of milk or in the oven covered lightly. Smaller pieces heat faster, while bigger portions need a bit more time to warm evenly.
    • Freezing
      Do you want to save some for later? Wrap individual portions and freeze for up to one month. This works great for both small and large batches, as you can take out only what you need.
    • Make-Ahead Tips
      Do you like preparing meals early? Mix ingredients the night before and store in the fridge. Bake fresh in the morning for best texture. Adjust the amount based on how many servings you need.

    Recipe Timing

    Prep Time: 10 minutes
    Cook Time: 25–30 minutes
    Rest Time: 5 minutes
    Total Time: 40–45 minutes

    Nutrition Information (Approximate)

    Do you want a balanced breakfast without overthinking it? Each serving has around 180–250 calories, with 6–9g protein. It also provides fiber from oats and natural sugars from fruit. Values may vary depending on ingredients and portion sizes used.

    FAQs

    Can I make this ahead of time?
    Yes, prepare the mixture the night before and bake in the morning.

    Why is my texture too dry?
    You may need more banana or milk for moisture.

    Can I replace eggs?
    Yes, use mashed fruit or yogurt instead.

    Why is it too soft inside?
    Bake a few extra minutes until the center sets.

    How do I store leftovers?
    Keep in the fridge for up to 3 days or freeze portions.

    Can I change the flavor?
    Yes, add spices, cocoa, or nuts to adjust taste.

    Conclusion

    Do you want a breakfast that feels easy and comforting every day? Healthy Breakfast Recipes to Start Your Day Right are all about simple steps and real ingredients that fit into your routine. You can adjust flavors, portions, and toppings based on what you enjoy or what you have at home. It’s the kind of recipe you’ll come back to again and again because it just works. Whether you’re cooking for yourself or sharing with family, it brings a warm, steady start to your morning without any stress.

    Recipe Card

    Healthy Breakfast Recipes to Start Your Day Right

    Recipe by admin
    Servings

    4

    servings
    Prep time

    10

    minutes
    Cooking time

    25

    minutes
    Calories

    180–250

    kcal

    Ingredients

    • 2 ripe bananas (use 1 for 2 people, 3–4 for more servings)

    • 2 cups oats

    • 2 cups milk

    • 2 eggs

    • 2 tbsp honey

    • 1 tsp cinnamon

    • 1 tsp vanilla extract

    • 1 tsp baking powder

    • Pinch of salt

    • ½ cup berries

    • 2 tbsp nuts

    Directions

    • Mash bananas in a bowl and mix with eggs, milk, honey, and vanilla.
    • Add oats, baking powder, cinnamon, and salt. Stir well and let sit briefly.
    • Fold in berries and nuts, then pour into a greased baking dish.
    • Bake at 180°C for 25–30 minutes until golden and set. Adjust time slightly for smaller or larger portions.

  • Breakfast Ideas That Make Mornings Better

    Breakfast Ideas That Make Mornings Better

    Introduction

    Ever wake up not knowing what to make that feels both easy and comforting? Breakfast Ideas That Make Mornings Better are all about simple meals that bring a little calm to busy starts. These soft scrambled eggs with warm toast and sautéed veggies have become my go-to when mornings feel rushed but I still want something homemade. The flavors are gentle, the steps are simple, and everything comes together without stress. It works just as well for slow weekends as it does for quick weekday mornings, giving you something warm and satisfying without overthinking it.

    Why You Will Love This Recipe

    Ever feel like breakfast becomes boring or too repetitive? This dish keeps things fresh without adding extra work. The eggs turn out soft and creamy, the vegetables add a bit of color and crunch, and everything feels cozy on the plate. It’s budget-friendly, uses everyday ingredients, and can easily be adjusted based on what you have at home.

    Ever wish you could save time in the morning? This recipe is quick enough for busy days but still feels like something special. It’s also flexible—serve it with bread, wrap it, or keep it simple. Breakfast Ideas That Make Mornings Better like this one are great for families, meal prep, or even a quiet solo breakfast.

    Ingredients

    Tip: Use fresh eggs for the best soft texture and flavor.

    • 6 large eggs
    • 2 tablespoons milk
    • 1 tablespoon butter
    • 1 small onion, finely chopped
    • 1 small tomato, diced
    • 1 small bell pepper, chopped
    • Salt to taste
    • Black pepper to taste
    • 4 slices bread (toasted)

    For 2 people: Use half the ingredients. For more than 4: Double everything as needed.

    Instructions

    Step 1: Preparation –
    Ever feel rushed chopping ingredients in the morning? Start by finely chopping onion, tomato, and bell pepper. Crack eggs into a bowl, add milk, salt, and pepper, then whisk until slightly frothy. This simple prep keeps cooking smooth and quick.

    Step 2: Main Cooking Process –
    Ever worry about overcooking eggs too fast? Melt butter in a pan on low heat. Add chopped vegetables and cook until soft and lightly fragrant. Keep the heat gentle so nothing burns, especially if making a smaller portion.

    Step 3: Combining Ingredients –
    Ever end up with dry scrambled eggs? Pour the egg mixture into the pan and stir slowly. Let soft curds form, folding gently. For 2 servings, cook faster with less mixture; for larger batches, give it a bit more time.

    Step 4: Finishing & Final Simmer –
    Ever unsure when eggs are done? Turn off heat when eggs look slightly soft and creamy—they will finish cooking from residual heat. Serve immediately with warm toast. Adjust cooking time slightly if you increase or reduce the quantity.

    Why This Recipe Works for Busy Days

    Ever need something quick that still feels homemade? This recipe comes together in minutes and doesn’t require special tools or prep. You can chop veggies ahead or use leftovers. It reheats well, making it perfect for meal prep or quick morning fixes when time feels tight.

    Tips & Tricks

    • Ever notice eggs turning rubbery too fast? Keep the heat low and stir gently. Cooking slowly makes them soft and creamy. If making for two, use a smaller pan so eggs don’t spread too thin. For bigger portions, cook in batches for better texture.
    • Ever feel veggies stay too crunchy? Chop them small so they soften quickly. This helps everything cook evenly without overcooking the eggs. When doubling the recipe, give vegetables an extra minute before adding eggs so they cook properly.
    • Ever struggle with bland flavor? Add a small pinch of salt at the start and adjust later. You can also add herbs at the end. If cooking a smaller batch, go light on seasoning first—it’s easier to add than fix.
    • Ever find toast getting cold too quickly? Toast bread at the end so it stays warm. For larger servings, keep toast covered with a cloth. If cooking for two, toast fresh slices just before serving for the best texture.

    Variations

    Meaty Version
    Ever want something more filling in the morning? Add cooked chicken pieces or small beef strips to the vegetables before adding eggs. It adds richness and protein. If cooking for two, keep the meat amount light so it doesn’t overpower the eggs.

    Vegetarian Option
    Ever want a lighter, veggie-packed start? Add mushrooms, spinach, or zucchini. These blend well with eggs and add texture. For larger servings, increase vegetables slightly while keeping eggs balanced so the dish doesn’t feel too heavy.

    Ingredient Swap
    Ever missing one ingredient at home? Swap milk with cream or even water for lighter eggs. Replace butter with oil if needed. For smaller portions, keep swaps minimal so the flavor stays balanced, and adjust gently for larger batches.

    Flavor Boost
    Ever want a stronger taste without extra effort? Add fresh herbs like coriander or a pinch of chili flakes. A little cheese can also melt nicely into the eggs. For bigger servings, add flavors slowly so they don’t become too strong.

    Serving Suggestions

    • With Fresh Fruit
      Ever feel breakfast needs something refreshing? Serve with sliced apples or bananas on the side. The sweetness balances the savory eggs. For smaller servings, keep fruit light; for larger groups, prepare a shared fruit plate for easy serving.
    • With Yogurt
      Ever want a creamy side? Add a small bowl of plain yogurt. It pairs nicely and adds a cooling touch. Adjust portion sizes easily—smaller bowls for two people or a larger serving dish for family-style meals.
    • Wrap It Up
      Ever need breakfast on the go? Wrap the eggs in flatbread for a quick meal. For two people, make smaller wraps; for more, prepare multiple wraps and keep them warm in foil for easy serving.
    • With Tea or Coffee
      Ever feel breakfast is incomplete without a drink? Pair this with warm tea or coffee. It makes the meal feel complete and cozy. Adjust drink servings based on how many people you’re serving.

    Storage Instructions

    • Fridge Storage
      Ever end up with leftovers? Store cooled eggs in an airtight container in the fridge for up to 2 days. For smaller portions, use compact containers to avoid drying out. For larger batches, divide into portions for easier reheating later.
    • Reheating
      Ever worry about eggs drying out? Reheat gently on low heat or in short microwave bursts. Add a small splash of milk to bring back softness. Smaller portions reheat quickly, while larger ones need a bit more time and stirring.
    • Freezing
      Ever think about freezing breakfast? Scrambled eggs can be frozen, but texture may change slightly. Store in small portions for best results. When reheating larger frozen batches, thaw first and warm slowly for better consistency.
    • Make-Ahead Tips
      Ever want to save time in the morning? Chop vegetables the night before and store in the fridge. You can also whisk eggs ahead. For bigger servings, prep everything in advance so cooking feels quick and easy.

    Recipe Timing

    Prep Time: 10 minutes
    Cook Time: 10 minutes
    Rest Time: Not needed
    Total Time: 20 minutes

    Nutrition Information (Approximate)

    Ever curious about what you’re eating? Each serving has around 220–280 calories, with 12–15g protein. It also provides vitamins from vegetables and healthy fats from eggs. Values are estimates and may vary depending on ingredients and portion sizes.

    FAQs

    Can I make this ahead of time?
    Yes, you can prep veggies and eggs earlier. Cook fresh for best texture.

    Why are my eggs dry?
    They cooked too long or on high heat. Keep heat low and stop early.

    Can I skip milk?
    Yes, eggs will still cook fine, just slightly less creamy.

    How do I keep eggs soft?
    Cook slowly and remove from heat while still slightly soft.

    How long can I store leftovers?
    Up to 2 days in the fridge in a sealed container.

    How can I adjust flavor?
    Add herbs, spices, or cheese based on your taste and portion size.

    Conclusion

    Ever wish mornings felt a little calmer and more enjoyable? Breakfast Ideas That Make Mornings Better don’t need to be complicated. This simple egg and veggie dish brings warmth, comfort, and flexibility to your table without adding stress. You can adjust it, change flavors, or keep it classic depending on your mood. It’s the kind of recipe you come back to again and again because it just works. Whether you’re cooking for yourself or your family, it fits right into real life and makes mornings feel a bit more manageable.

    Recipe Card

    Breakfast Ideas That Make Mornings Better

    Recipe by admin
    Servings

    4

    servings
    Prep time

    10

    minutes
    Cooking time

    10

    minutes
    Calories

    220–280

    kcal

    Ingredients

    • 6 large eggs

    • 2 tablespoons milk

    • 1 tablespoon butter

    • 1 small onion, chopped

    • 1 small tomato, diced

    • 1 small bell pepper, chopped

    • Salt to taste

    • Black pepper to taste

    • 4 slices bread

      For 2 people: use half ingredients. For more than 4: double as needed.

    Directions

    • Chop vegetables and whisk eggs with milk, salt, and pepper.
    • Chop vegetables and whisk eggs with milk, salt, and pepper.
    • Add eggs and stir gently until soft curds form.
    • Turn off heat while eggs are slightly soft and serve with toast.